How to Change Data File Location in Outlook?
This article is specifically written on how we can change outlook data file location to a new location or folder.
Outlook data files (if configured in more than one email) are saved in a different location in a hidden folder by default at
C:\Users\Your user account name\AppData\Local\Microsoft\Outlook
Outlook data file is an important file which creates when you configure Microsoft outlook for Gmail, Hotmail, Yahoo, etc. and for office emails or private domain email addresses.
[Read: How to Configure Microsoft Outlook by Using IMAP and POP Settings?]
Once you have configured POP email the data file will be .PST (Personal Storage Table).
On the other hand, if email is configured via IMAP settings then you will have .OST (Online Storage Table) data file also known as Offline Outlook Data File.
Here is an example in the below screenshot where it differs .PST and .OST data files:

Change Outlook Data File Location to Different Location
Important Note: Before you start the below process of changing the outlook data file location to a new location using the following article, I would highly recommend that you NOT skip any steps given in this article and I will assure you that by the end of this post your outlook data file location will be changed and will sync your emails properly.
This is a bit lengthy process but it does work as we have tested on one of our configured email accounts in Outlook.
Close your outlook application and follow the steps below:
Step 1. Press Win + R to open the Run dialog box, then, type control and hit Enter or click OK. This command will open the Control Panel on your screen.

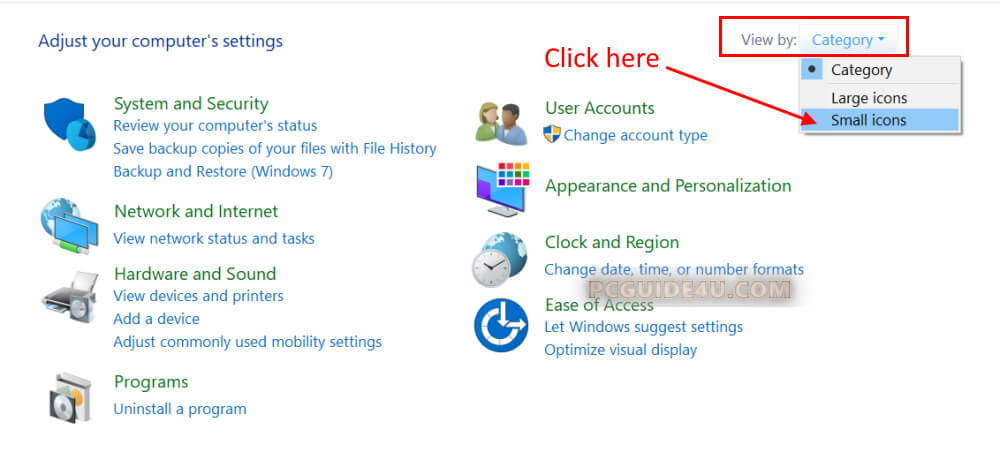
Step 2. Now from the right-top, change View by: Category to Small icons
Note: Selecting small icons gives you more visibility to all control panel items.
Step 3. Here to locate and click on the Mail (Microsoft Outlook) (32-bit) icon

Step 4. A Mail Setup – Outlook window will pop up. Click on Data Files… option to open data file settings.

Step 5. Select an account from the given list (if you have more than one email account configured) and click on the Open File Location… option

Step 6. The above action will take you directly to the folder wherein outlook .PST or .OST file is saved. Right-click on the data file and select the option Cut

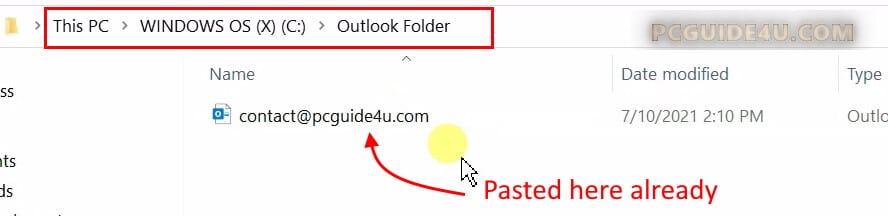
Step 7. After that, go to the folder or location where you want to create a new location for the outlook data file, then right-click on the empty space and select the Paste option
For example: We have created a new folder named Outlook Folder in the C drive and pasted the copied file.
As a result of the above action, we have successfully created and moved the outlook data file to the new location.
How to Change Data File Path to New Folder Location in Outlook Application?
At this point, in addition, we need to launch the Microsoft Outlook application and need to provide the path to the new data file location folder.
The following steps will help you to complete this task:
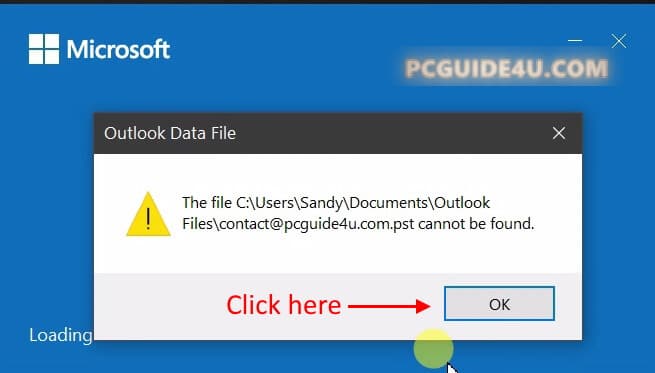
Step 1. Open the Microsoft Outlook application.
At the moment, if the outlook is loading the outlook profile, it will give you a message like .PST or .OST cannot be found. You need to click OK to continue.
Here is the image for your reference:
Step 2. A new window will open on your screen and ask you to Create/Open Outlook Data File.
If you remember, we have already created a new location above on Step 7.
Provide the new location path for the outlook data file and click Open and a new location path is set for the selected email account.

Step 3. Now, while doing a Send/Receive All Folder, you will have an error code for sure similarly below:

Step 4. To fix the email send/receive error, we need to open the email account settings:
File Menu > Account Settings > Account Settings
Step 5. In the Outlook Email Account Settings window, you will notice that the New Folder Location is not available.
Follow this video to get it done:
Once you are done with the above video, you will see a new data file location for your selected email that is set up correctly.

Finally, feel free to click Send/Receive All Folder and your emails will start syncing.
How to Move Outlook Data File Location to New Location? Share on X
1 thought on “How to Change Outlook Data File Location to New Location?”