Multiboot USB Drive for Windows Installation
In this step-by-step guide, you will learn how to create a multiboot USB drive using Ventoy, a free, open-source tool that makes this process effortless.
If you are someone who regularly installs or repairs Windows systems, creating a Multiboot USB drive is a must-have solution. Instead of carrying multiple USBs for different Windows versions, a multiboot USB lets you boot from a single USB device and choose from multiple ISO files.
What is a Multiboot USB Drive?
A Multiboot USB drive is a flash drive that can boot multiple operating systems or tools. This means you can store multiple ISO files such as Windows 10, Windows 11, Windows Server, and even Linux distribution, all on one USB stick.
Why Use Ventoy for Multiboot USB?
Ventoy is one of the best tools for creating a multiboot USB drive. Here are a few reasons why it stands out:
- No need to format the USB every time you add a new ISO.
- Supports both Legacy BIOS and UEFI.
- Compatible with Windows, Linux, and macOS.
- Supports ISO, WIM, IMG, VHD(x), and EFI files.
- Just copy ISO files to the USB and Ventoy will list them on boot.
What You Need Before Starting
- A USB drive with at least 16 GB capacity (32 GB or more recommended).
- Ventoy tool (download from official site).
- Windows ISO files (Windows 10, 11, etc.).
- A computer with admin rights.
Step-by-Step Guide: Creating a Multiboot USB Using Ventoy
Step 1: Download Ventoy
Visit the official Ventoy website and download the latest version for Windows. Extract the ZIP file to a folder.

Step 2: Install Ventoy on the USB Drive
- Run the Ventoy2Disk.exe file.
- Select the USB drive from the device list.
- Click on Install.
- Confirm when prompted (this will format the USB, so back up your data first).
Once done, your USB is now Ventoy-enabled.

Step 3: Copy ISO Files to USB Drive
After Ventoy installation, your USB will appear as a regular drive. Simply drag and drop your ISO files (e.g., Windows 10 ISO, Windows 11 ISO, Windows Server ISO) or copy and paste into the USB drive.
[Read: Download Windows 10 Pro Disk Image (ISO)]
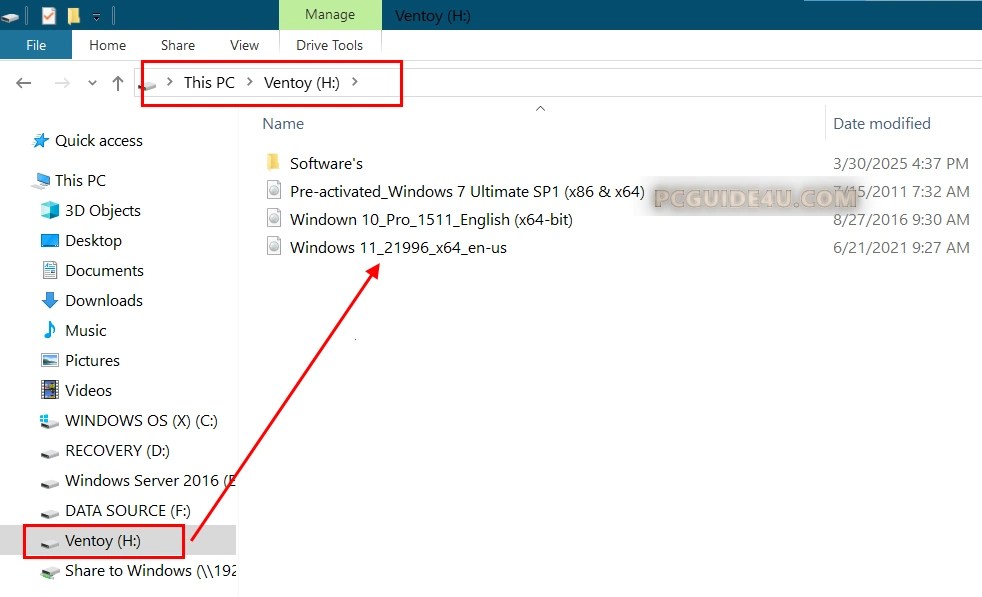
There is no need for special configuration. Ventoy automatically detects the ISOs and displays them at boot.
Step 4: Boot from USB
The below steps are to test:
- Insert the USB into the target computer.
- Enter the boot menu (usually by pressing F12, Esc, or F10 at startup).
- Select your USB drive.
- Ventoy’s boot menu will appear with a list of ISO files. Select the version of Windows you want to install.

Tips for Best Results to Create a Multiboot USB
- Use high-quality USB 3.0 drives for faster performance.
- Keep ISO file names short and avoid special characters.
- You can also organize ISOs into folders for better navigation (Ventoy supports it).
Creating a Multiboot USB drive using Ventoy is one of the easiest and most efficient ways to manage multiple operating system installations. Whether you’re an IT professional or a casual tech enthusiast, this tool can save you time and hassle. With Ventoy, simply copy your ISO files and you are good to go.
Have you tried Ventoy? Let us know in the comments which ISOs you’ve loaded or if you faced any issues.
Frequently Asked Questions (FAQs)
