Install Windows Server 2016
Windows Server 2016 is a robust and versatile operating system designed for server management, offering enhanced security, performance, and virtualization features. Follow this article to install Windows Server 2016 on your laptop standalone or as dual boot.
If you’re considering installing it on your laptop, this guide will walk you through the prerequisites, requirements, and installation process in a simple and user-friendly manner.
Tips for a Smooth Installation
- Dual Boot Option: If you want to keep your existing OS, consider creating a dual-boot setup.
- Use Virtualization: If you’re not ready to replace your current OS, use tools like Hyper-V, VMware or VirtualBox to run Windows Server 2016 as a virtual machine.
- Monitor Performance: Keep an eye on resource usage. Windows Server 2016 is resource-intensive, so ensure your laptop can handle it efficiently.
Prerequisites for Installing Windows Server 2016
Before diving into the installation, make sure you have the following in place:
- A Compatible Laptop: Ensure your laptop supports Windows Server 2016. Check hardware compatibility on the official Microsoft website.
- Windows Server 2016 ISO File: Download the ISO file from this article.
- Bootable USB Drive: Use tools like Rufus or the Windows USB/DVD Download Tool to create a bootable USB drive with the Windows Server 2016 ISO.
- Backup Data: Installing a new OS may erase your existing data. Back up all critical files into external hard drive before proceeding.
- Activation Key: Have your product key ready for activation or KMS activation can be used
System Requirements
To install Windows Server 2016, your laptop should meet these minimum specifications:
- Processor: 1.4 GHz 64-bit processor
- RAM: Minimum 2 GB (4 GB recommended for better performance)
- Disk Space: At least 32 GB of free space
- Network Adapter: Ethernet adapter compatible with gigabit throughput
- Display: Monitor capable of at least 1024×768 resolution
Ensure your laptop exceeds these requirements for optimal performance.
Windows Server 2016 Installation Process
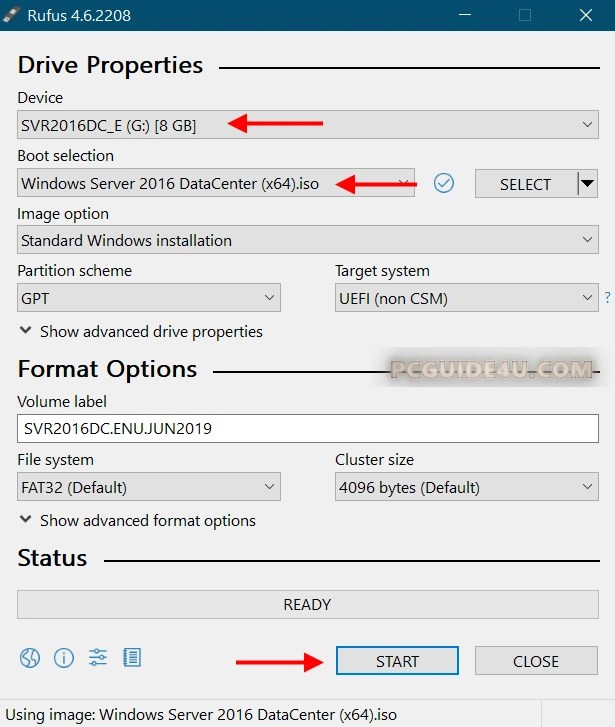
Create a Bootable USB Drive
- Download Rufus from its official website.
- Insert a USB drive (minimum 8 GB) into your laptop USB port.
- Open Rufus and select your USB drive.
- Under “Boot selection,” choose the Windows Server 2016 ISO file.
- Click “Start” to create the bootable USB. Wait for the process to complete.
Configure Your Laptop’s BIOS
- Restart your laptop and access the BIOS/UEFI settings. The key varies by manufacturer (e.g., F2, F10, or DEL). Check manual of your manufacturer.
- Navigate to the “Boot” section and set the USB drive as the first boot device.
- Save changes and exit the BIOS.
Begin the Installation
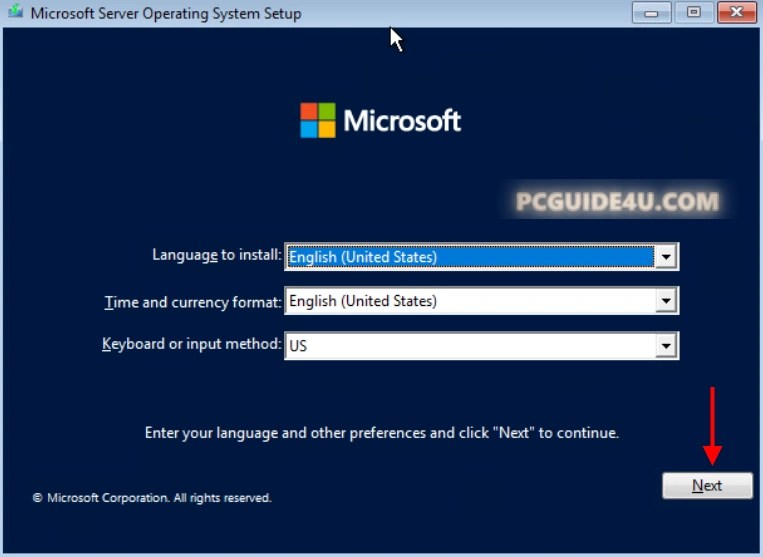
- Insert the bootable USB drive and restart your laptop.
- The Windows Server 2016 installer will load. Select your language, time, and keyboard preferences, then click “Next.”
- Click “Install Now” to begin the installation.
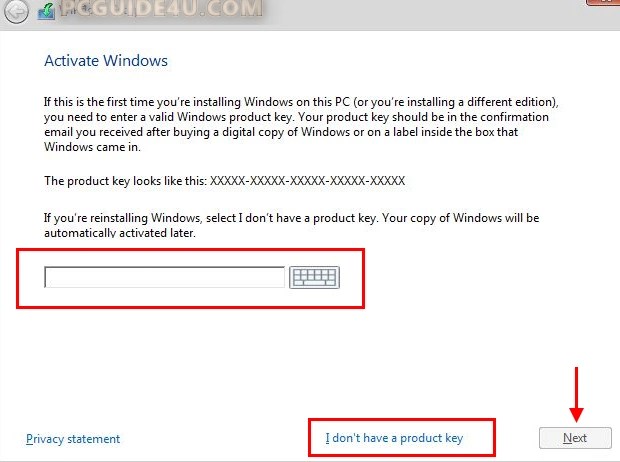
Enter the Product Key
- Enter your product key when prompted. If you don’t have one, choose “I don’t have a product key” to continue with the evaluation version.
- Select the Windows Server 2016 edition you want to install (e.g., Standard or Datacenter).
Choose the Installation Type
- Select Custom: Install Windows only (advanced).
- Choose the drive where you want to install Windows Server 2016. If necessary, format the drive.

Complete the Installation
- The installation process will begin. Your laptop will restart 2-3 times during installation and may take up-to 45 minutes to complete the installation process.
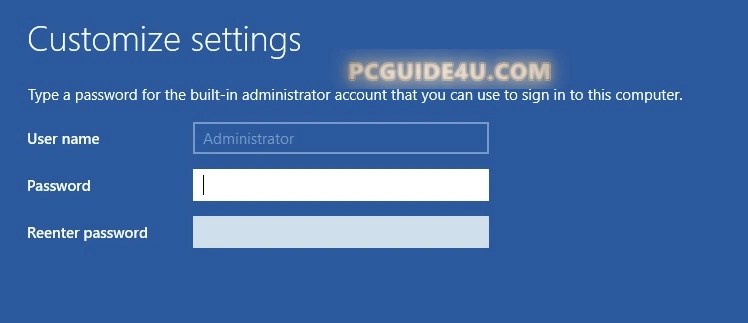
- Once completed, set up the initial configuration:
-
- Create an administrator password.
- Configure network settings if required.
Post-Installation Steps
- Activate Windows Server 2016 using your product key.
- Install necessary drivers for your laptop from the manufacturer’s website.
- Enable Windows Update to install the latest patches and security updates.
By following this guide, you can successfully install Windows Server 2016 on your laptop.
This versatile OS opens up opportunities to explore advanced server functionalities, making it a valuable addition for IT enthusiasts and professionals. If you encounter any issues during installation, refer to the Microsoft Support website for assistance
How to Install Windows Server 2016 on Your Laptop? Share on X