Share Files and Folders Over the Network
Yes, you are on the right page to get this task done. You must be looking for ways to share your important files or to share folder over a network.
Sharing your data is easy with Windows operating systems. In Windows, Microsoft provides an option to share files and folders across the network.
Sharing any of your files and folders over a network is another feature of Windows. Let me help you share your files and folders on your network.
If you are using more than one computer in an office or home network, you can easily share your files and folders from one computer and access it from second or multiple computers that are available in the same network.
The internet is not necessary for sharing files and folders over the network in Windows PC’s. You can share it on a local network.
Note: There is only one condition where your computer should be on the same network to share the access.
How to Share a Folder over the Network?
However, there are several methods to share folders over the network. Hereby, in this post I will show you the easiest way to share a folder.
You can even share the entire drive to give access to another computer on the same network. However, make sure that whenever you share a folder over the network, you are sharing all the sub-folders and files in the shared folder.
The following steps will work with Windows 7, 8.1, Windows 10 and later.
Set up Network Sharing Settings
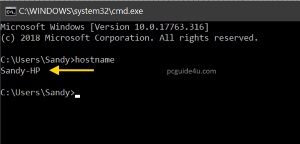
Before we start, we need to check the computer name of the machine by which we are going to share the file or folder or a particular drive.
To check the machine’s identity, open the Windows command prompt and type hostname. This will show you the name of the machine that we need on our end.
[Read: How to Open Command Prompt Admin in Windows?]
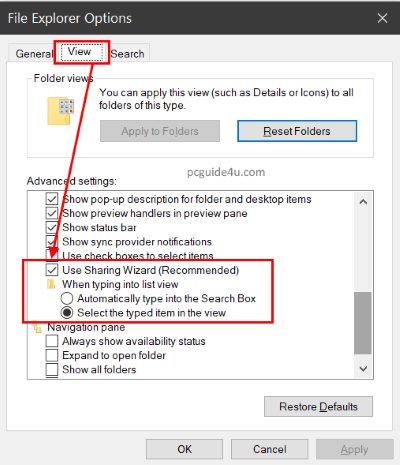
Step 1. Follow the steps below to check the sharing wizard:
- Press Win + R to open the Run dialog box
- Type control folders and click OK
- This will open Windows folder options in Windows 7 and File Explorer Options in Windows 8.1 & 10
- Click on View Tab then, scroll bit down to make sure “Use sharing Wizard (recommended)” option is checked
Step 2. Now open Windows Network and Sharing Center.
- To open this, launch the Run dialog box again with Win + R
- Copy or type following command control.exe /name Microsoft.NetworkAndSharingCenter and click OK
- Navigate to the left pane and click on Change advanced sharing settings

Step 3. In this window, you will see the option to change sharing options for different network profiles. As you can see in the image below for Private, Guest, Public and All Networks.
Expand one by one and finish the task below:
- Turn on Network Discovery for your private or public network.
- Need to Turn on File and Printer Sharing for your private or public network.
- Turn on Public folder sharing if you want to share items in the Public folder
- Turn on or off password protected sharing. If you Turn it on, it will ask for the system user ID and password of the machine from which you have a shared folder. I recommend that you keep it turned off.

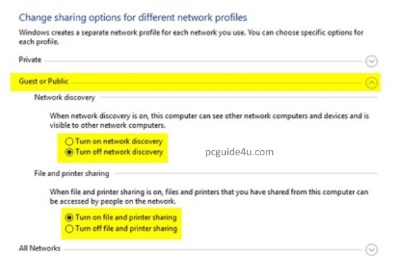
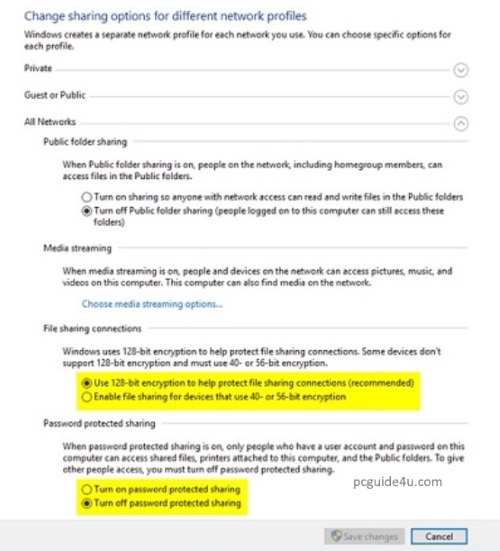
Click on Save Changes once you have selected the above options.
By doing the above steps, your machine is on a network and discoverable on a network with other computers.
Share a Folder using Folder Properties
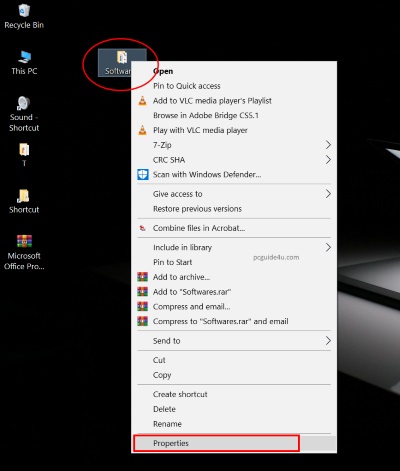
Step 1. Go to the folder that you want to share over the network or you can create a new folder to share files or even you can share the entire system drive.
- For instance, i will pick a folder named Software, which i am going to share with my local network.
- Right-click on the folder that you want to share and select Properties
Step 2. Folder Properties will open on your screen. Follow the steps below now:
- Select the Sharing Tab
- Click on Advanced Sharing…
- Tick the check box in the Share this folder
- Click Permissions
- Define permissions as per your requirement.
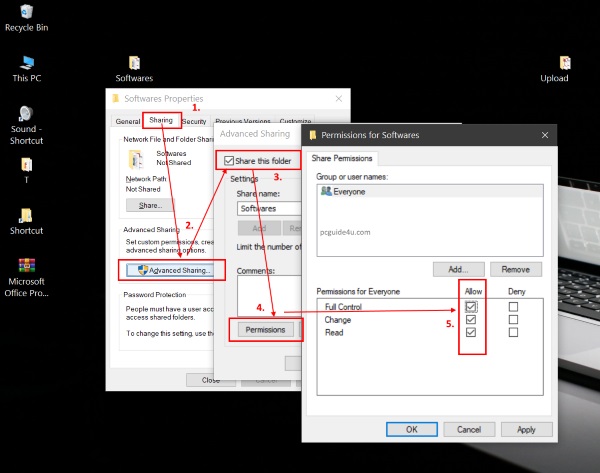
Click on Apply and OK to close the permissions window. Again, click Apply and OK to close the Advance-sharing screen and go back to folder properties.
There is now a network path created for the selected folder that you want to share over the local network.
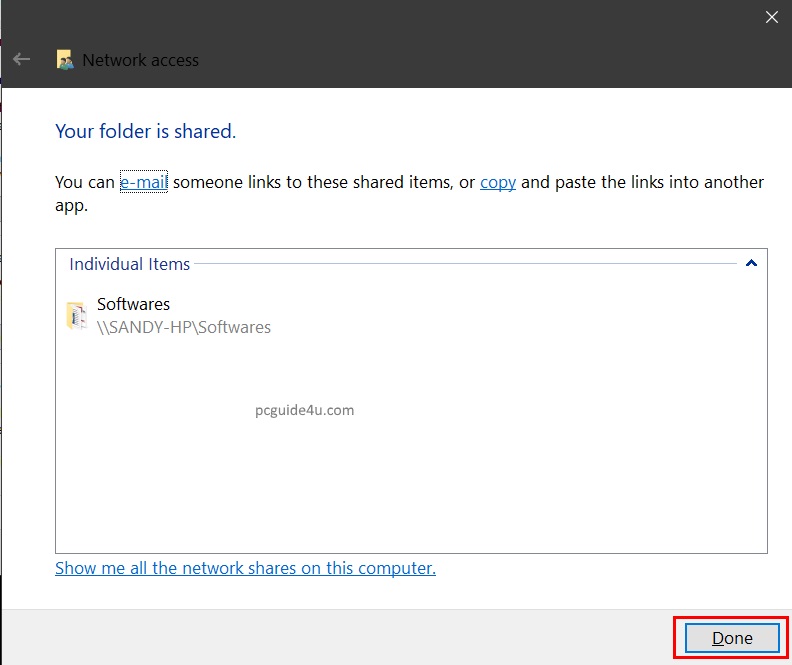
Click on the Share button and a Network access window will open on your screen. From the drop-down, select Everyone or the desired option as per your requirement and then, click on the Share button.
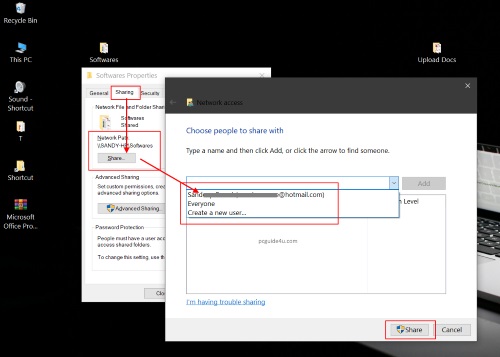
Due to the above task, you have successfully shared your folder over the network and it will be accessible to others to whom you have shared (by option individual or everyone).
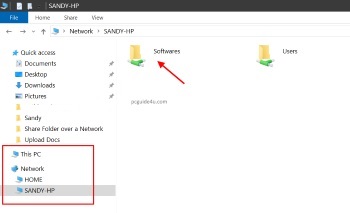
Lastly, you may access it from another computer that is on the same network
- Open File Explorer by using Win + E
- Click on the Network folder from the left pane
- From the given list of network computers, open the network PC and you will see the shared folder there
[Read: How to Create a Network Connection Shortcut to Desktop?]
Share Folder over Network in Windows Share on X