Share USB Printer with Windows Network
Here is the good news for you, Microsoft Windows has a very good feature to share USB printer to the network. Rather than installing printers in every machine, you can just share it easily to your network.
Your printer is probably connected to only one computer with a USB cable and due to you are unable to take prints from other computers.
So the question is, do you use a printer at home or in the office?
If you have a USB printer connected and installed on a single computer and that computer is on your home or office network. So sharing a printer with everyone over your network is pretty easy.
First, we need to enable the sharing settings of the installed printer.
Hence, you can follow the steps given below to share the USB printer to your home or office network:
[Read: Solve Print Spooler Services Not Running Error]
Step 1. Press Win + R to open the Run dialog box. Once open; type control and hit the OK button to open the Control Panel.
Navigate to Devices and Printers and click on it to open.

Step 2. Select the installed printer and right-click on it, then select Printer Properties.
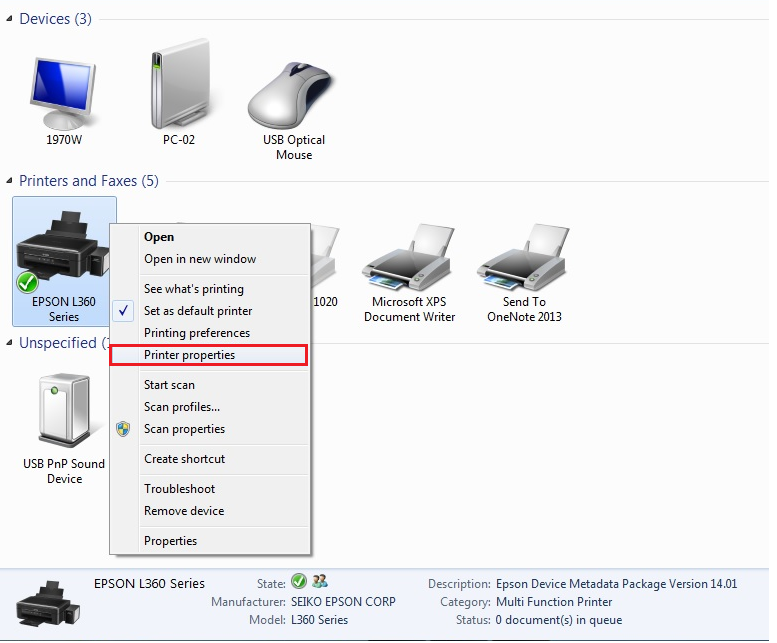
Step 3. Printer properties will open on your computer screen.
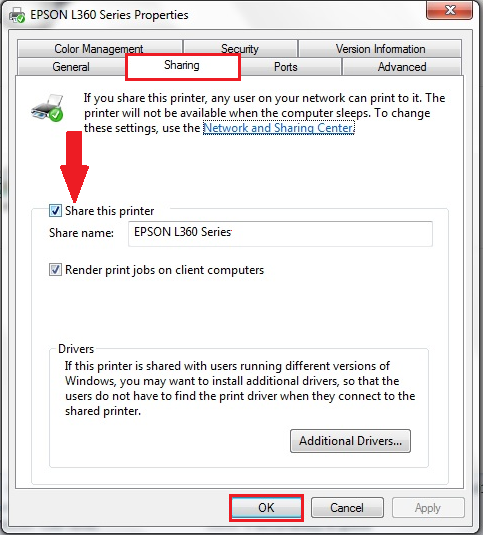
Click on the Sharing Tab, check the box for Share this printer, then click the OK button.
As a result, the selected printer is now shared from an existing computer to a connected network.
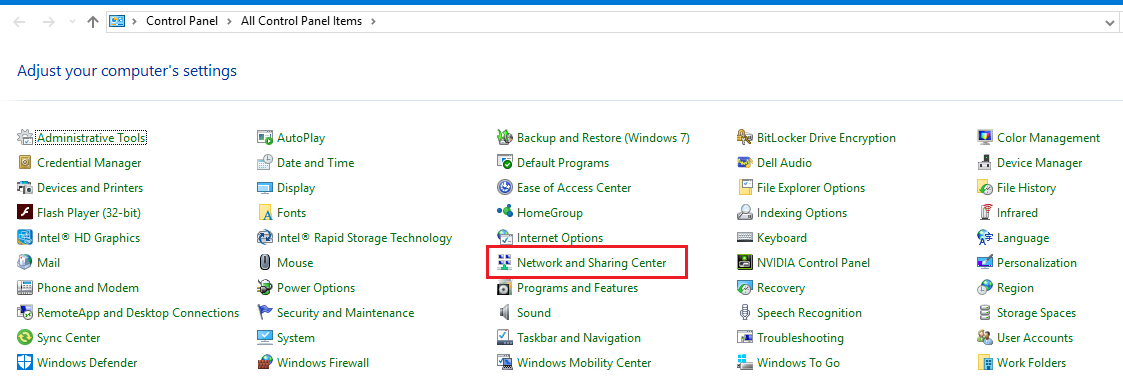
Step 4. Now we need to find out the IP Address from the computer. To check the IP Address, the steps are given below:
- Press Win + R to open the Run dialog box. Once open; type control and hit the OK button to open the Control Panel.
Now click on Network and Sharing center or Network and Internet.
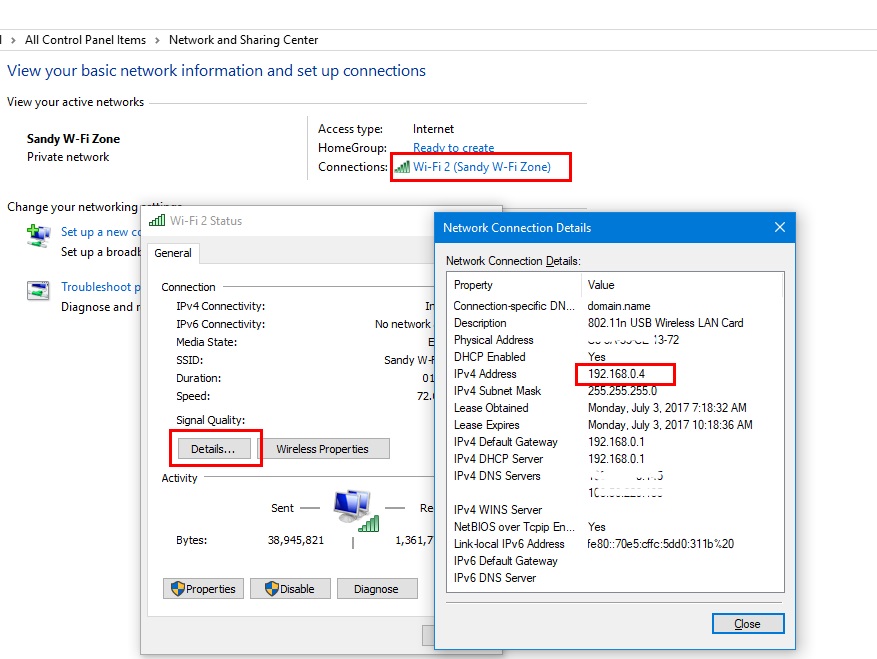
- Click on the Network name (as mine is: Wi-Fi 2). This will open Network properties.
Then click Details.
Network connection window will open and note down the IP address as shown in below image.

How to Share a Printer on a Network?
By doing all the above steps; printer has been shared from the installed computer. Follow the steps given below for Windows Network Preferences:
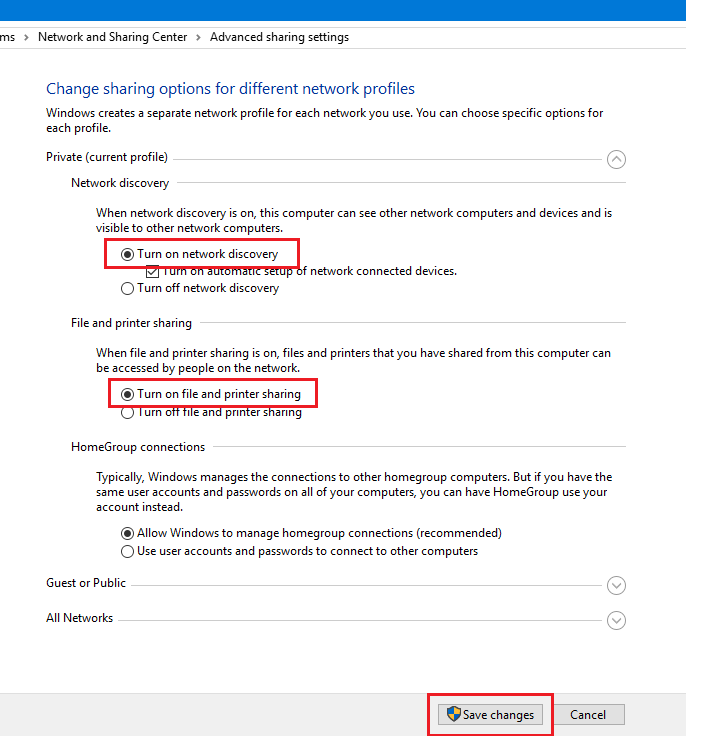
Windows Network Preferences Setup
- Now on the left pane, click on Change advanced sharing settings.
- Click Turn on network discovery and Turn on file and printer sharing radio button then, click Save changes.
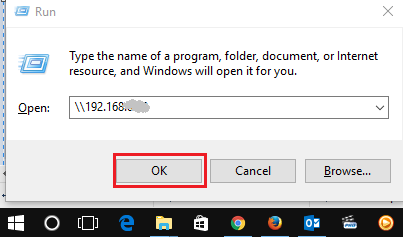
- Now open Run Command (Win+R) and type backslash twice (\\) with a noted IP address as on step 4.

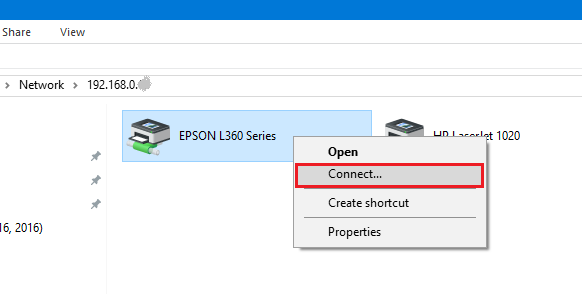
- You will now see shared printer on your screen. Right-click on it and select connect…. It will do the little process and finish it automatically.
This works when you have multiple computers connected to the same network but are not necessarily part of the same home or work group.
There is a only one condition applicable is that the shared computer should be turned on at the time of printing command given by another computer/system.
It doesn’t matter if your shared computer is on a locked screen (windows login screen).
How to Share USB Printer in your Network? Share on X