Turn off Windows 10 Update
Microsoft mandates OS updates to automatic downloads and to be installed to ensure your device stays up to date and functional. Still, many users are looking for ways to turn off the Windows 10 update.
This article will show you how you can prevent or stop automatically updating your Windows 10.
Microsoft has developed Windows 10 operating system such as Windows XP, Vista, 7 and 8.1 as well including the latest one Windows 11.
But many of the users face a similar problem in it, like Windows automatic updates. In Windows 10, user doesn’t have the control to stop updating software updates in it.
How do I disable or turn off Windows 10 updates?
You must be looking for this answer. Yes, we can disable or turn off Windows 10 updates by making little changes to Windows update services.
Stop or Disable Updating Windows 10 Automatically
This article is specifically written to disable Windows 10 updates only. The given method will work with Windows 10 Home & Professional.
Follow the steps given below to stop automatically updating your Windows 10:
If using Windows 10 Home
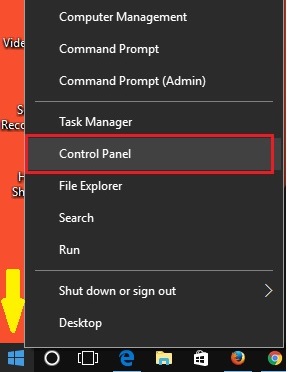
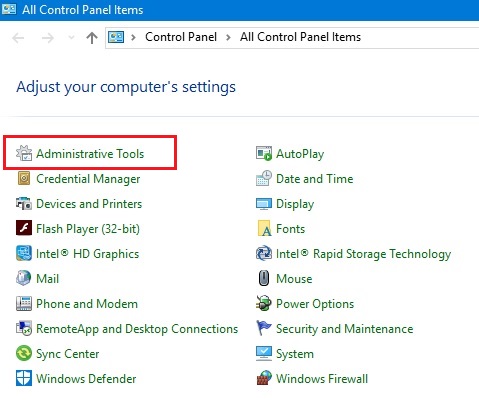
Step 1. Go to the Control Panel. To open the control panel, right-click on the Start Menu and select the control panel.
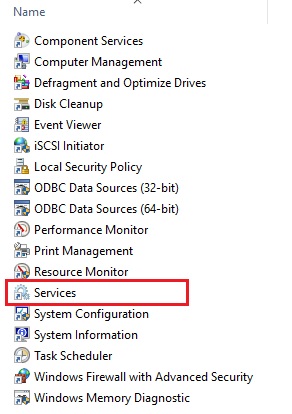
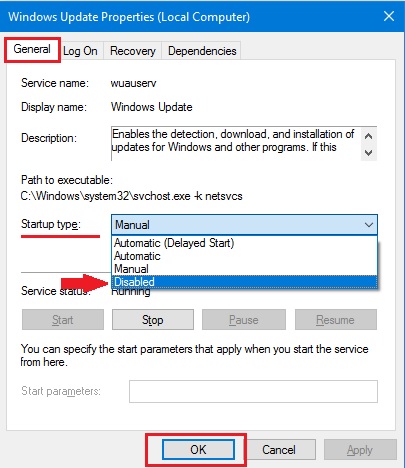
Scroll down to Windows Update and double click to open its properties.
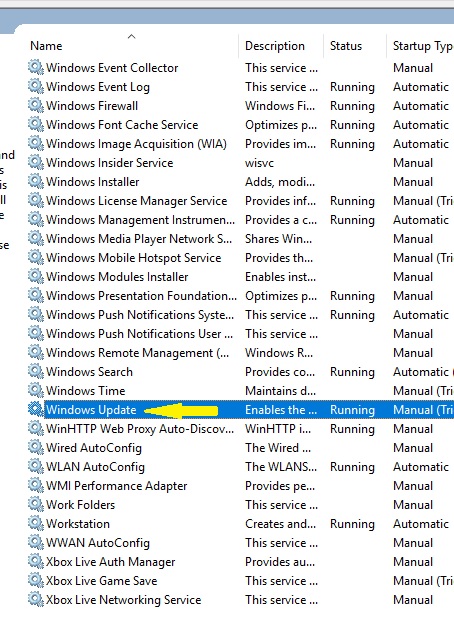
- Click on the General Tab
- Go to Startup Type: and from the drop down, select Disabled
- Then, click the Stop button just below and
- Click the Apply and OK button to save and close.
By doing the above steps, the Windows update settings have been saved. You may now close all open windows from your screen.
In the future, if you wish to update Windows, you will have to go back to Services and turn it on occasionally to download and update your Windows.
If using Windows 10 Professional
If you are using Windows 10 Professional, then we have another option to disable it, turn off Windows 10 updates from its Group Policies.
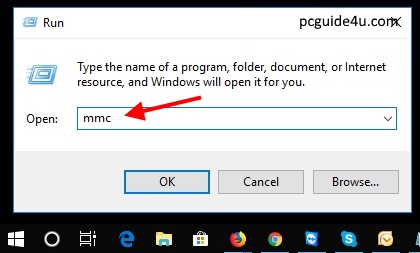
Step 1. Open the Run dialog box. Press Win + R to open the Run dialog box.
Type mmc and hit Enter or click OK. MMC stands for Microsoft Management Console.
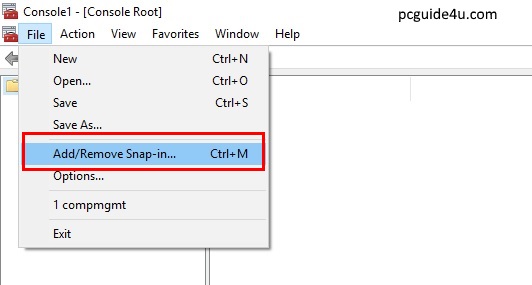
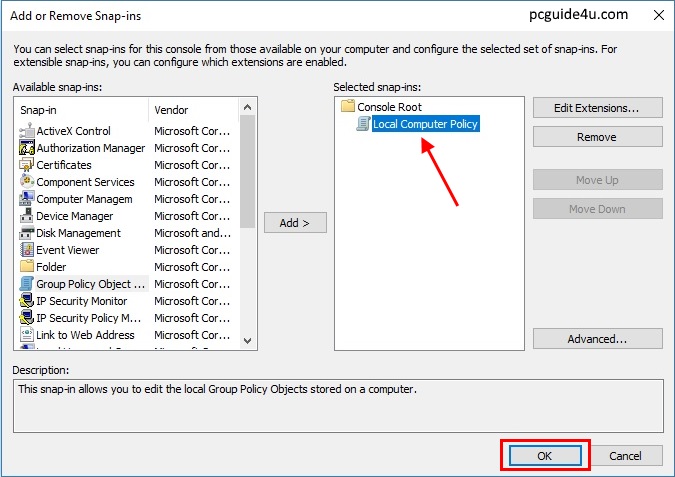
Step 2. The Microsoft Management Console window will appear. Go to the File Menu and select Add/Remove Snap-in.
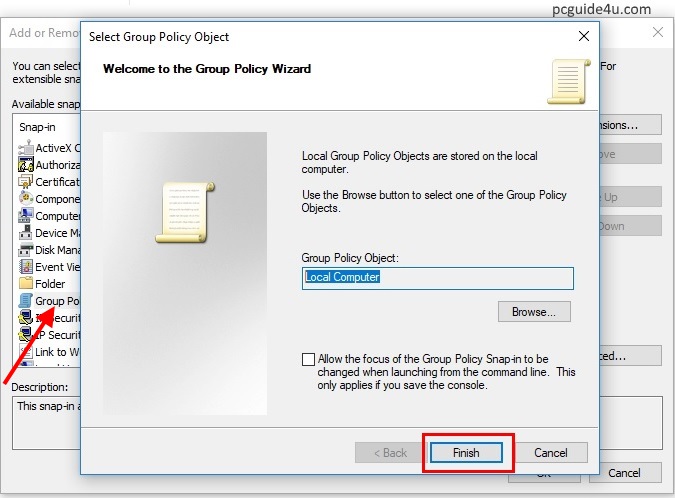
Locate and double click on Group Policy Object and it will open a new screen. Do not change anything on this screen.
Just click on the Finish button to continue.
Step 4. You can now see the Local Computer Policy added under the console root on the right side of the previous screen automatically. You just need to click on the OK button to continue.
Computer Configuration > Administrative Templates > Windows Components > Windows Update
Then, go to the right pane and select it and double click on Configure Automatic Updates.
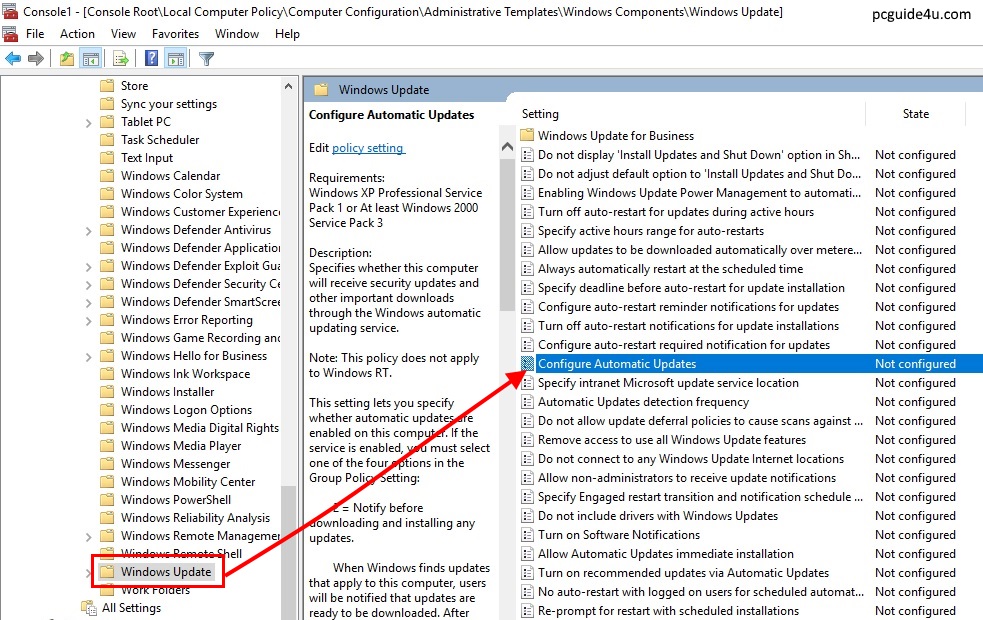
- Select Enabled.
- Then, under Options from the drop-down, select 2 – Notify for download and auto install
- Finally, click Apply and OK to save the above settings

After doing the above settings, rebooting the computer is mandatory. By rebooting Windows, the above settings will be affecting your Windows.
From now on, your Windows 10 will not download and install updates on its own. This will notify you if any updates are pending to download. It’s up to you if you want to download and install or not.
Recommendation
We do not recommend that you disable, stop or turn off automatic Windows 10 Updates.
Windows Updates are always good, from time to time launched by Microsoft for bug fixes, improvements and reliability of the operating system.
If you see that your computer is fine with downloads in the background and does not affect your work, it is not advisable to disable or turn off the Windows 10 update.
Stop, Disable or Turn off Windows 10 Updates Share on X