Windows Photo Viewer
Whenever you open any photo, picture or image on your Windows 10 or Windows 11, by default, it opens with the Windows 10 Photos App. What if you don’t like this app and want to add or install Windows photo viewer in your latest Windows 10?
Windows Photo Viewer was the default image viewer application in previous versions of Windows, such as Windows 7 and Windows 8.

Since the release of Windows 10 in July 2015, a number of new apps have been added to the platform. For instance, Microsoft introduced the Photos app as the default image viewer and editor.
In essence, Windows Photo Viewer is not included with Windows 10 and 11. But if you want, you can add or install it with a small registry modification.
The major reason why I am writing this article is because many users really don’t like the new Photos app that came with Windows 10 and Windows 11.
Therefore, if you are one of those people who dislikes the built-in Photos App in Windows and prefers the earlier Windows photo viewer, this post is valuable to you.
Windows photo viewer might still have it in your system, if you have upgraded from Windows 7 or Windows 8.1.
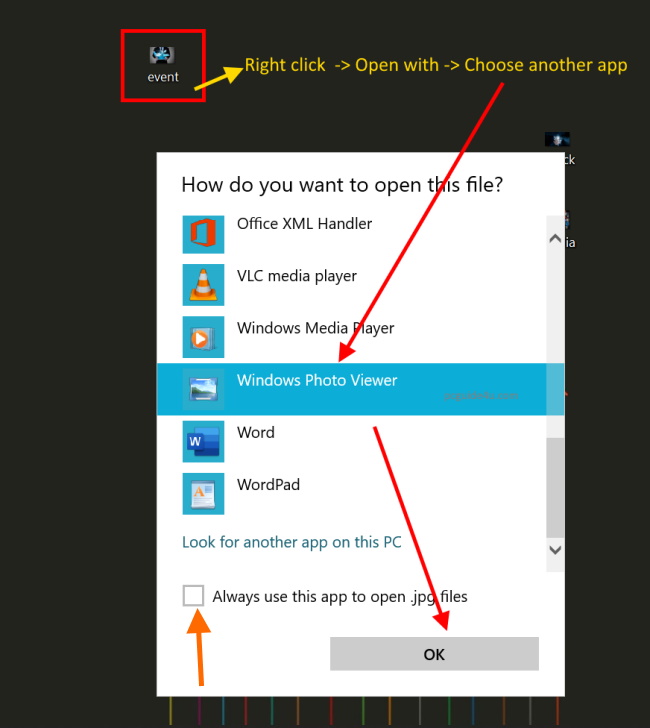
To check this, right-click on any of your photo, picture or image, and choose Open with option and you will see a Windows photo viewer in this list.
If you don’t see it there or have a preinstalled Windows, then you need to add it manually by following the steps below.
How to Install Windows Photo Viewer in Windows 10 or Windows 11?
As mentioned above, we need to modify the registry in order to get the photo viewer in Windows 10 and Windows 11. Hence, before we start, it’s better if we backup Windows registry. Sometimes, it can be dangerous, if you make a mistake while working on registry that time registry backup will help you.
I have done all the steps to my both Windows 10 having version 1903 and 1803. Certainly, it works like a charm for me.
If you follow the steps properly, you will get a Windows photo viewer for your Windows 10 or Windows 11.
Step 1. Download the following text file to your desktop using the download button below. Change the file extension from .txt to .reg.
Make sure the hidden file extension settings are enabled.
How to View Hidden Items and File Name Extensions in Windows 10 and Windows 11?

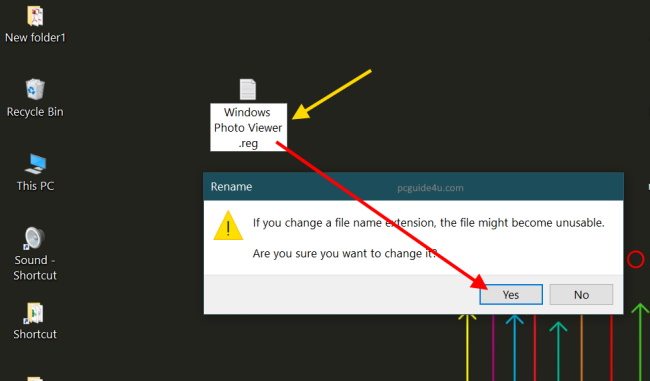

Step 2. The above steps will convert this text file into a registry file as the file extension has been changed.
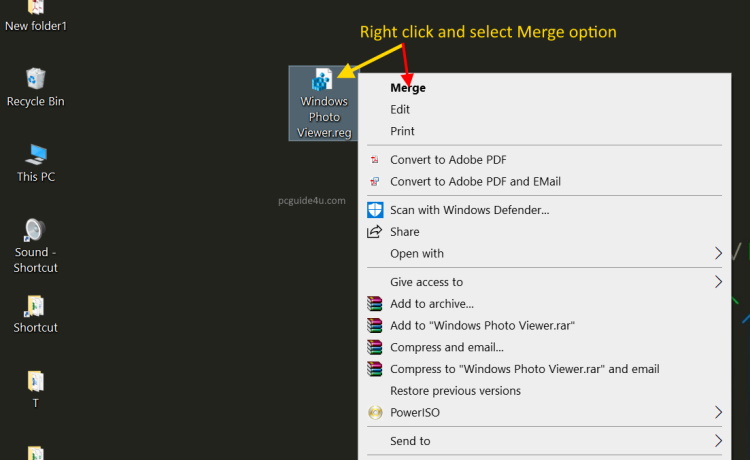
If you notice that the file icon has also changed. Right click on this file and select Merge option from the given list.
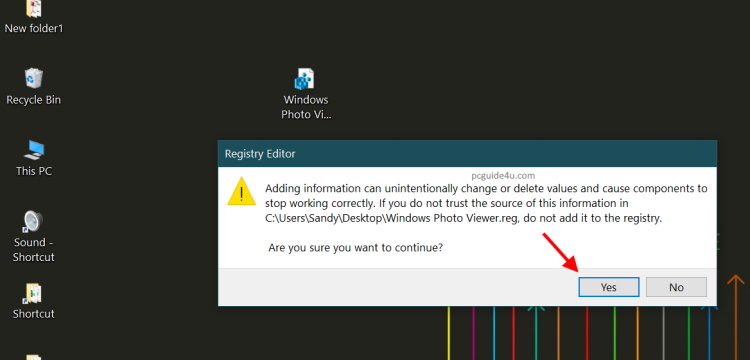
Step 3. A formal registry notification will appear on your screen regarding your follow-up action of adding a registry file.
Windows requires your permission to add this reg key so you need to click Yes to continue.
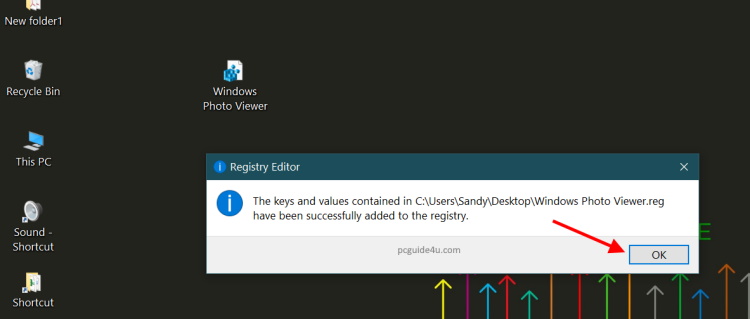
Step 4. Finally, you will see a confirmation message through your Windows which says,
“The keys and values contained in C:\Users\Your user account name\Desktop\Windows Photo Viewer.reg have been successfully added to the registry”.
Alternate Method to Add Windows Photo Viewer
Download and extract the Windows photo viewer.reg file directly from the below download button. After that, follow Step 2 to Step 4.
After a restart, once your Windows 10 is back on. Right-click on any image, photo or picture, select Open with option and then, Choose another app -> scroll down and select More apps.
Windows 10 will give you a list of installed programs in your system. Scroll down and locate and select Windows Photo Viewer then click OK to save settings.
Note: if you wish, you can tick the check box for Always use this app to open .JPG, .PNG or other files.
This way, Windows 10 and Windows 11 are technically allowed to open your .JPG, .PNG, .BMP or other file extensions on the Windows photo viewer app.
Now you know the entire process for how to install Windows photo viewer to your Windows 10 and Windows 11. So, what are you waiting for? Just do it.
Windows Photo Viewer in Windows 10 Share on X