Administrator Account in Windows 7
You will know shortly how to enable the administrator account and disable it back?
Microsoft provides three types of user accounts in its Windows OS. Administrator account, Standard user account and Guest user account. They all have different controls and authorizations as per user needs.
First, understand the difference between Windows user account types as below:
Types of Windows User Accounts
Administrator Account: Administrator user account has complete access to install and remove software and can make any changes to system settings.
Administrators may be prompted to provide their password for confirmation before being allowed to open as per your given command, and make changes that affect the system and other users too.
Standard User Account: A standard user account can use most of the installed software and change system settings that do not affect other user accounts.
If a Standard account user wants to make some kind of change, which may affect another user account, UAC (user account control) prompted your screen and will ask to enter administrator password to get the given command done.
Guest User Account: Basically, a Guest account allows users to access limited features to have temporary access to your computer.
For example, if someone is using the Guest user account, the user can’t install the software or change the settings either. Default Guest account cannot be password protected.
Note: Windows 10 does not have the ability to add a Guest account.
[Read: Add a Guest Account in Windows 10 with Limited Access]
How to Enable or Disable Windows 7 Administrator Account?
Follow the steps given below to disable or enable an administrator account in Windows Vista and Windows 7.
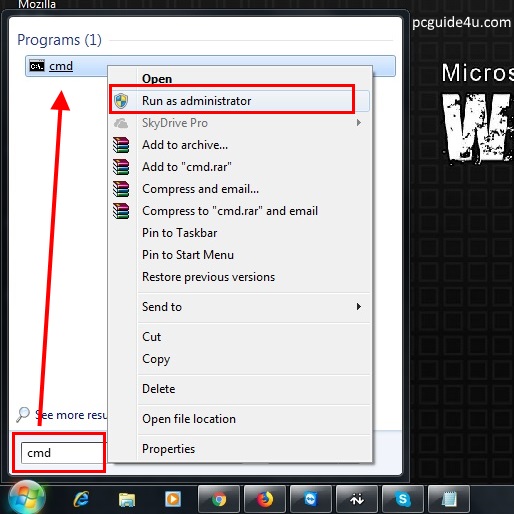
- Click Start and type cmd in the Search box.
- In the search results list, right-click on cmd or Command Prompt, and then select Run as Administrator.
- Click Continue when you are prompted by User Account Control.
- To Enable: At the command prompt, type net user administrator /active:yes, and then press Enter. Make sure the command is typed correctly.
- To Disable: At the command prompt, type net user administrator /active:no, and then press Enter. Check the image below:

- Type exit, and then press the Enter button on your keyboard.
- Log out of your current user account

Based on the action you have chosen using one of the above commands, you can login with a disabled or enabled administrator account with all rights and be ready to make changes to your computer.