Create System Restore Point
Certainly, you must know how to create a system restore point in a Windows computer? If not, continue reading this article. First of all, let me tell you about system restore.
Creating a system restore point will record all your current settings and programs or any system modification that has been done.
If anything causes the system to crash and burn, simply run a system restore utility and you will be back in business without any hassle.
If you are going to make any minor or major changes to your Windows (Windows 7 and later Windows editions), creating a system restore point is very important. System restoration is a quick way to protect yourself from any system crashes.
Note: The System Protection option should be turned on in order to create or use the system restore option for Windows.
[Read: Turn on System Protection to Create System Restore Point]
How to Create a Restore Point on Windows?
Just wondering what happens if we don’t have any restore points created earlier? There should be no place in your Windows where we can go back and make everything functional.
Often times your Windows gets into a problem where you look for a solution and doing a restore is the first option for us. Hence, this article can help you to create a system restore point in your Windows.
By following the steps given in this article, you can create a system restore point on Windows 7, 8.1 and 10 in the same way.
For example, the steps shown in this article are done on Windows 10 but the same can be done on Windows 11 as well.
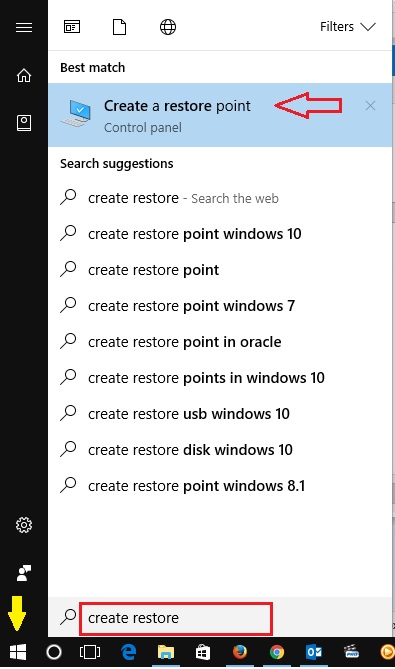
Step 1. Click on Start Menu Search and type, create restore.
As a result at the top of the search items, you will see Create a restore point.
Click to open.
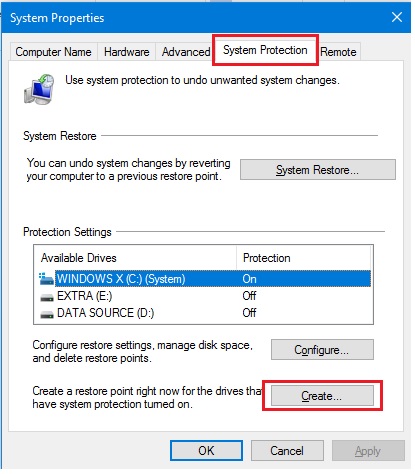
Step 2. A System Properties dialog box will appear on your screen.
Under the System Protection Tab, click on the Create button.
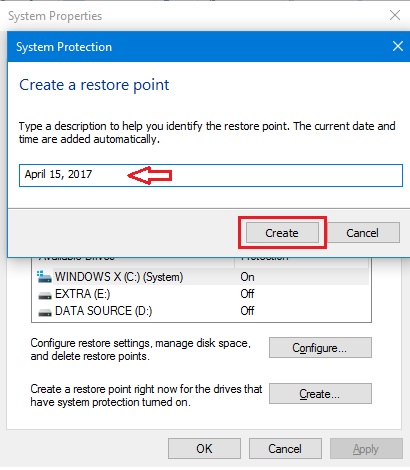
Step 3. Need to Name the restore point (any name that you can remember) and click Create.
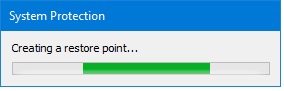
Step 4. By doing the above action, it will do a little process to create a restore point for your Windows.
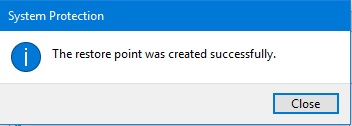
Step 5. Finally, you will see a notification when the restore point is created. Click the Close button.
Lastly, close all other open dialog boxes as well. You have successfully created a system restore point in your Windows.
Consequently, now whenever your PC starts giving trouble, you can use this created restore point.
Simply initiate the system restore process and choose a created restore point to get your Windows back on track.
[Read: How to Use System Restore in Windows?]
How to Create System Restore Point in Windows Share on X