Share Laptop WiFi Internet
This article tells you a very easy trick to share laptop WiFi internet to another desktop PC by using an ethernet cable.
Suppose your laptop is connected to WiFi network and you have another desktop computer nearby which is not connected to the internet and doesn’t have WiFi capabilities to connect.
Yes, this is possible if you would like to share your laptop internet to the desktop to get internet connectivity by using an ethernet cable.
The only thing you need is an ethernet cable, which you can use to establish the connection from your laptop to a desktop. Furthermore, follow the steps below to share your internet connection from your laptop to your desktop.
How to Use Laptop WiFi Internet on Desktop with LAN Cable?
First, the settings need to be done on the Laptop:
Step 1. Open Network Connections.
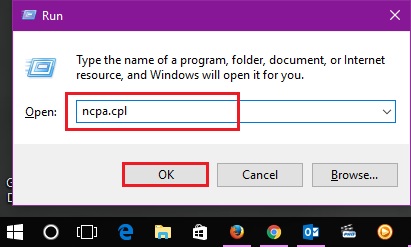
- To open Network Connection, you need to open the Run command by using the key combination Win + R on your laptop keyboard.
- Run dialog box that will appear on your screen. Type ncpa.cpl and click OK.
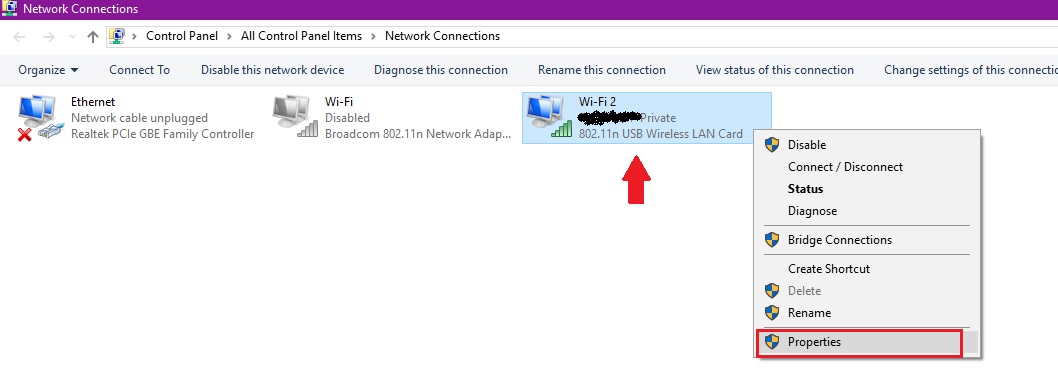
Step 2. The network Connections screen will be on your screen. Right-click on the connected WiFi network adapter and select Properties.
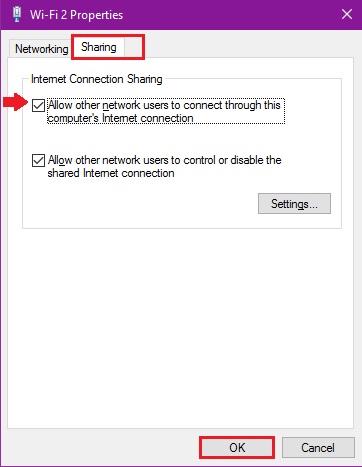
- Select the Sharing Tab
- Checkmark the box that says, Allow other network users to connect through this computer’s internet connection
- Click OK to save settings and close the Network Connections window
By doing the above steps, you have successfully shared your laptop’s WiFi internet.
Second, you need to connect an ethernet cable from your laptop’s ethernet port to a desktop ethernet port to establish the internet for your desktop PC.
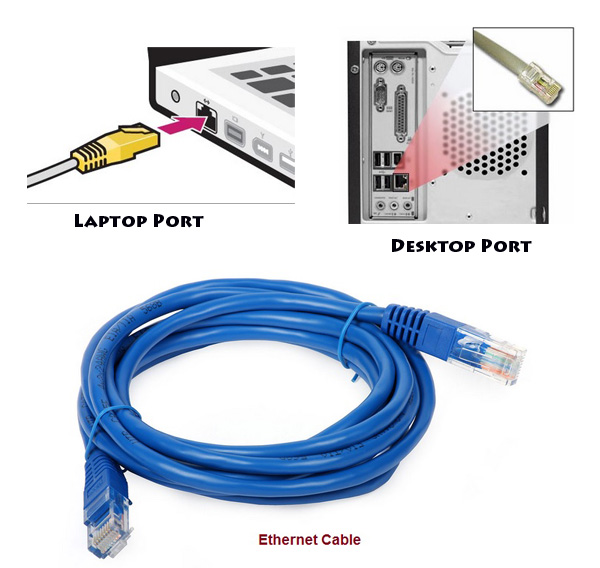
Once you have connected both ends of the ethernet cable (one is on the laptop and the other to desktop) that means you are done with all the steps.
Now, go ahead and check the internet on your desktop PC. You will be able to use the internet shared from the laptop by using an ethernet cable.
So, this is the easiest way to share laptop WiFi internet to any desktop computer without any third party software.