Remove “Share with Skype” Option
After an upgrade from Windows 7 or 8.1 to Windows 10, share with Skype feature is enabled in the right click context menu. If you are the one who is looking for the way to remove share with Skype option then, follow this post.
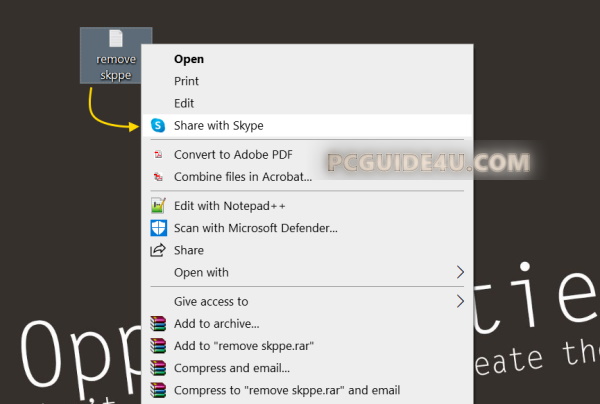
Most likely, you must have seen “Share with Skype” option in the right-click context menu in your Windows 10.
However, it is a very useful feature (mostly for business users) but most of us don’t really use it or it doesn’t require to us.
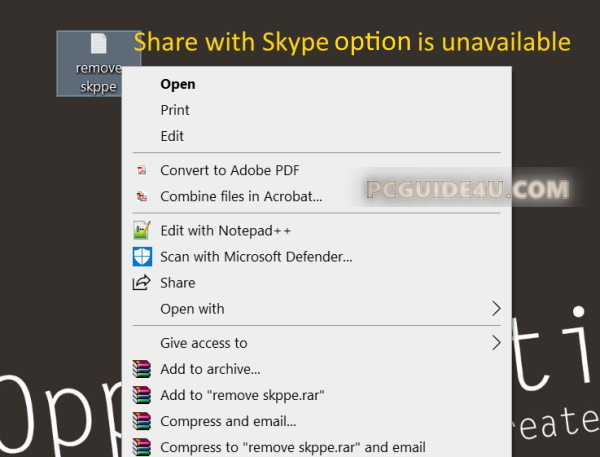
For example, if you right-click on any of your files, a context menu will appear with certain options and one of them is Share with Skype. Check below image:
By using the following steps, you can easily disable or remove Share with Skype option from the right-click context menu of any file.
How to Disable Share with Skype Option?
We will use the registry method or a little change in the Windows registry to remove Share with Skype feature.
[Read: How to Backup and Restore Windows Registry?]
In future, if you require this option back, just revert the steps and Share with Skype come will start appearing in the right click menu.
Step 1. Press Win + R to open Run dialog box and type regedit then, press Enter button. This will open Windows Registry Editor.
Step 2. Follow below given path:
HKEY_LOCAL_MACHINE\SOFTWARE\Classes\PackagedCom\Package
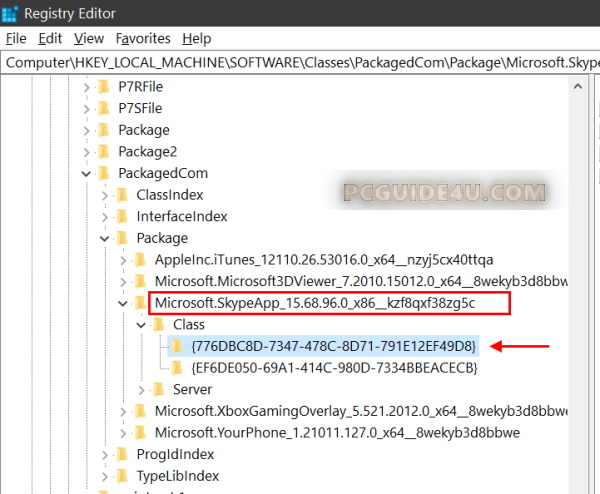
Step 3. Now, once you expand Package key, locate Microsoft.SkypeApp. In my system it is as below:
Microsoft.SkypeApp_15.68.96.0_x86__kzf8qxf38zg5c
Note: This key may be different in your machine depending on the version of Skype you have installed, but the initials (Microsoft.SkypeApp) will be the same.
Step 4. Expand Microsoft.SkypeApp_15.68.96.0_x86__kzf8qxf38zg5c or the key shown at your end and follow below path:
\Class\{776DBC8D-7347-478C-8D71-791E12EF49D8}
Step 5. The moment you have selected the key {776DBC8D-7347-478C-8D71-791E12EF49D8}, in the right pane, look for string value DllPath which contains the data value Skype\SkypeContext.dll
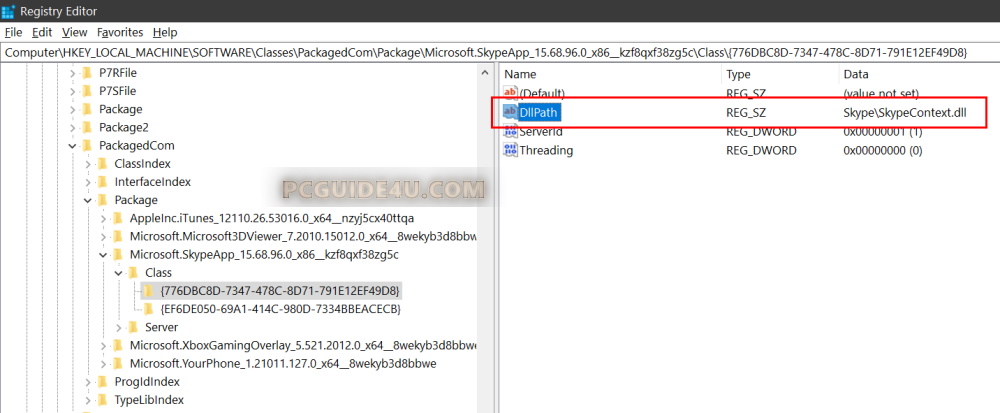
This is the key which is responsible to show “Share with Skype” option in the right-click context menu of any file.
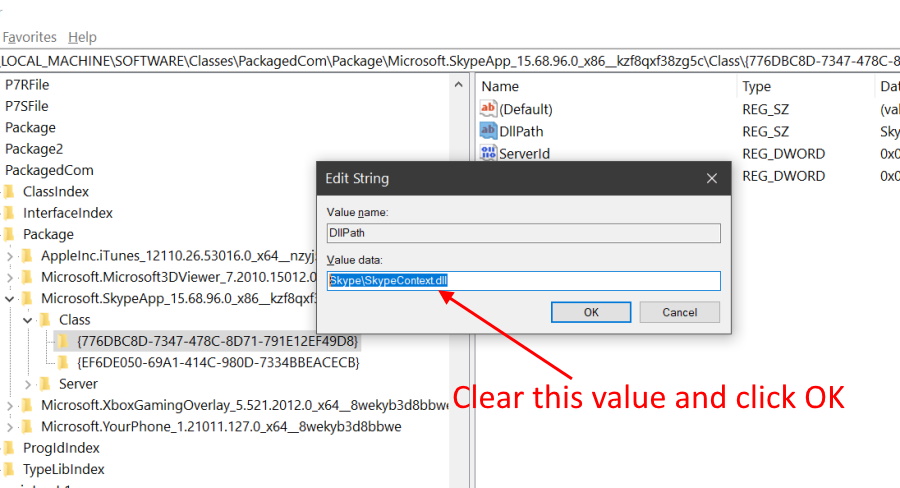
Step 6. In order to remove Share with Skype option, double click on DllPath string and delete or clear the value Skype\SkypeContext.dll and click OK to save settings.
Close Registry Editor.
The above process will do an immediate effect to your Windows.
To check, now go back to any file and do a right-click. Share with Skype option is no longer available in the context menu.
Restore Share with Skype Option in Right-click Menu
In the future, if you require or decide to restore “Share with Skype” option back in the right – click menu:
- Reach on Step 6 above and set the value Skype\SkypeContext.dll for DllPath and click OK to save the settings.
- You will get the option right back on right-click context menu
[Read: How to Delete Skype Contacts?]
Important Note:
If you on an older Windows 10 version or Skype version. You may need to delete following key to remove “Share with Skype” option:
HKEY_CLASSES_ROOT\*\shell\ShareWithSkype
The moment you delete the key, it will remove that option from your right-click context menu. Reference article