Disable OneDrive from Windows File Explorer
This article tells you how you can turn off or disable OneDrive from Windows file explorer. But before you go ahead, do you know exactly what the OneDrive is? You may find it useful for you.
OneDrive is part of Microsoft’s service for saving files in the cloud, that is available free up to 5 GB to all the users of a Microsoft account.
Microsoft OneDrive offers users a simple way to store, sync and share all kinds of files. Files can be synced to a PC and accessed from any of the web browsers.
For example, check out the image below:

This post shows how you can remove or disable OneDrive from the file explorer with the help of Windows Registry Editor.
Note: Before we start, it is best to backup your Registry. If you know how to back up the Registry then please go ahead and do it and if not follow the link below:
[Read: How to Backup Windows Registry?]
Turn Off OneDrive from Windows Explorer Navigation Pane
Can you see in the navigation pane of your Windows file explorer, there is a OneDrive name and logo that is permanently fixed in the File Explorer sidebar.
Many users want to remove or disable it because of no use to them, but they don’t know how to do?
To remove or disable OneDrive from the file explorer, follow the steps given below:
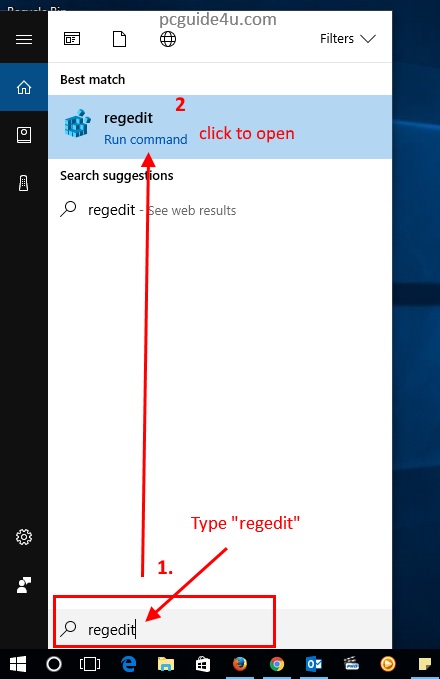
Step 1. On your Windows 10 or Windows 11, Press Win + S to open Windows search.
Step 2. Now go to the search box and type regedit
See the results at the top of the page. Click on the result in order to open the Registry Editor.
Step 3. Once the Windows Registry Editor opens, navigate to the following location:
HKEY_CLASSES_ROOT\CLSID\{018D5C66-4533-4307-9B53-224DE2ED1FE6}
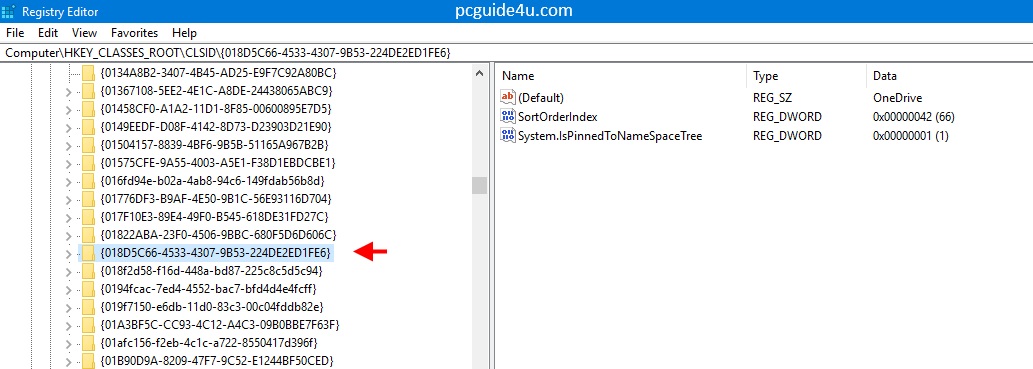
Step 4. Once you reach to the location, select the value {018D5C66-4533-4307-9B53-224DE2ED1FE6} and look to the right side of the windows.
To open it, double-click on the REG_DWORD entry labeled System.IsPinnedToNameSpaceTree and change the value from 1 (one) to 0 (Zero).

Click on OK to save and close this dialog box then close the Registry Editor.

The changes we have made above will take immediate effect on your computer. We do not even require logging off or restarting the computer.
To check, open the Windows file explorer and see OneDrive option has been removed from your file explorer navigation pane.
If you are still seeing it, you may require logging off or restarting your PC. However, the above steps work properly.
[How to Hide or Show Windows 10 Navigation Pane from File Explorer?]
Turn Off, Remove, Uninstall, Disable OneDrive Share on X