Install Windows 7 – Steps from Start to End
First of all, let us tell you that Windows 7 is the most popular Windows OS version, developed by Microsoft. Most likely computer users love to use Windows 7 until Windows 10 was introduced. Maybe, still many users are on Windows 7 because it’s very user friendly and easy to use by all the age group users. Sometimes, you might have got some issues with your Windows 7 wherein, restoration and other fixes won’t work. Therefore, you need to take your computer to any local store in order to install Windows 7 operating system on it because you don’t know the steps to install a fresh copy of Windows 7.
But do you know, it is very easy to install Windows 7 on your computer just fulfilling few requirements. I hope, most of you know the process of Windows installation, but many of you still want to know the Windows installation process with requirements. In this article, I will show you the step-by-step guide to install Windows 7 by using a flash/USB drive. Install Windows 7 (Step-by-Step Guide) Share on X
Tools Required to Install Windows 7
- Working Windows PC with high-speed internet connection
- Minimum 8 GB Pen drive with free Space
- Download Windows 7 ISO image – Pre-activated
- Download and install Media Creation Tool (To make USB bootable)
Install media creation tool on computer in order to make your pen drive bootable by using Windows 7 ISO image. Watch below video to create USB/Pen Drive bootable by using Media Creation Tool.
Caution: This article is for education and learning purpose. Before we start the installation process, highly recommend you to backup your important documents, files, pictures, music, etc to any external drive and unplug it, once backed up. By doing fresh installation, you will lose everything from your PC.
Steps to Install Windows 7 via USB
Step 1. Insert the bootable Windows 7 USB to your computer in which you want to install a fresh copy on Windows 7. Now turn off or shut down your PC.

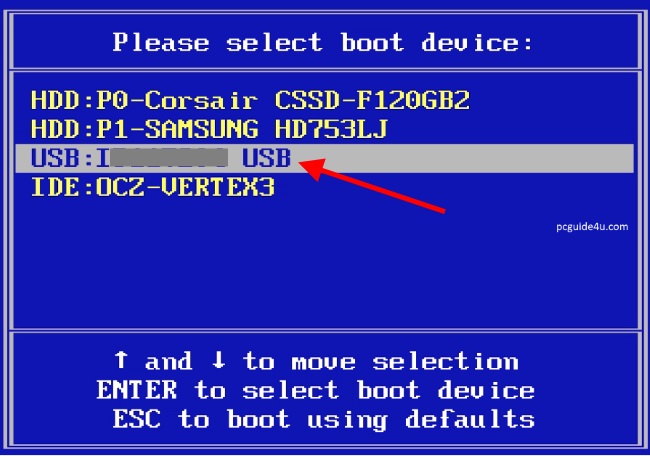
Step 2. At the moment will turn on the computer, we need to get into the Boot Menu.
Boot menus are varied as per the manufactures, but most of boot menus come with F9 or F12 so, start tapping both keys (F9 or F12) parallely and as a result, you will see a system boot menu on screen.
Select USB drive from the boot device list and hit Enter button to continue. If you won’t get, check system manufacture manual.
Step 3. Certainly, It will start the installation process, wait for it until Windows is loading files…
Install Windows 7 (Step-by-Step Guide) Share on X

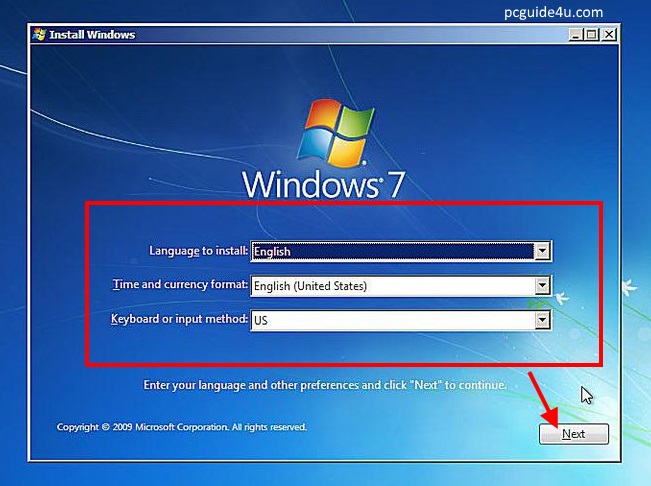
Step 4. It will jump to the next screen within quick seconds and will ask you to select language, time, and keyboard input method. You will change the preferences, if required. Otherwise, click “Next” button to continue.
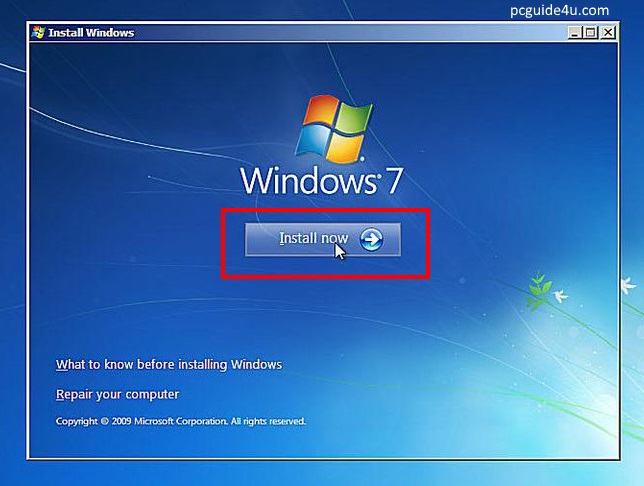
Step 5. On the next screen, in the mid of the screen there is an “Install now” button. Click on it to continue the installation.
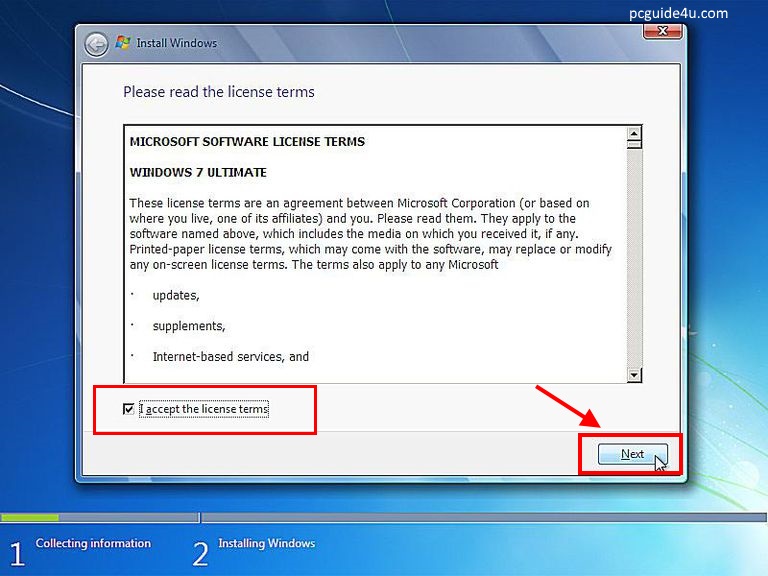
Step 6. Now wait for a few seconds, the Windows setup process is starting. Next screen comes is a textbox containing the Windows 7 Software License terms agreement (scroll and read it). Tick mark the checkbox “I accept the license terms” and click “Next” to continue.
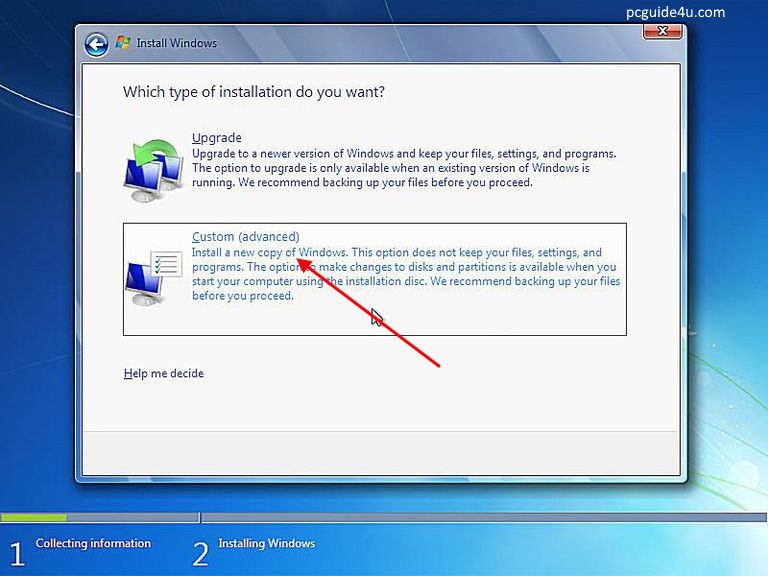
Step 7. We need to choose the installation type here. It should have options Upgrade and Custom (advanced). As we are doing a fresh installation of Windows 7, select “Custom (advanced)”.
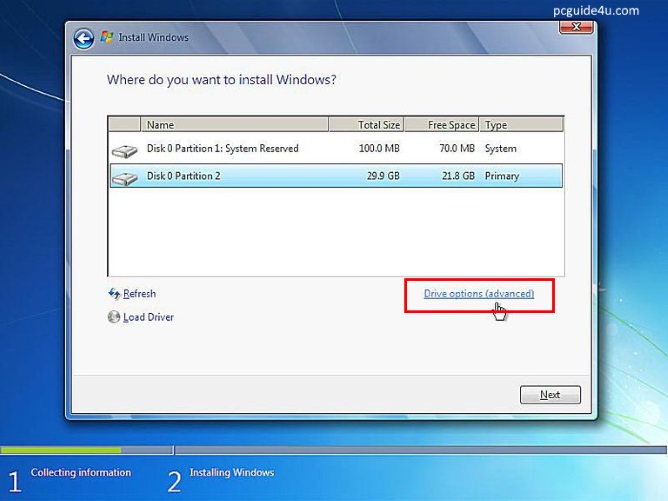
Step 8. It will show you the hard drive partitions. Click “Drive options (advanced)” from the right. This will expand the drive actions that we need to take on hard drive partition.
Continue Reading Steps to Install Windows 7….
Install Windows 7 (Step-by-Step Guide) Share on X
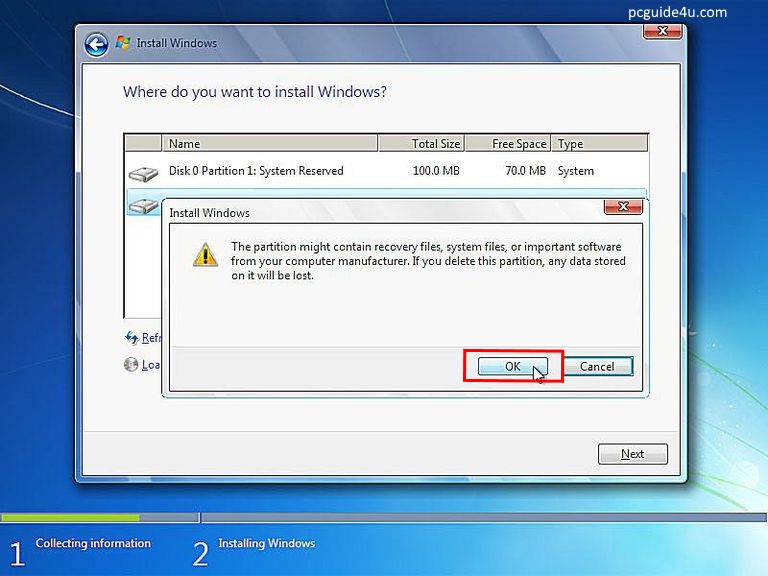
Step 9. Select partition one by one and hit “Delete” button to remove the partition. You may have prompted a message by Windows 7 installation “The partition might contain recovery files, system files, or important software from your computer manufacturer. If you delete this partition, any data stored on it will be lost.” Click OK to continue.
Step 10. The above process will remove all hard drive partitions and shows your hard drive as “unallocated space”. Select unallocated space and hit “New” from the options below and OK to continue and then, hit “Next” to continue to install Windows 7.

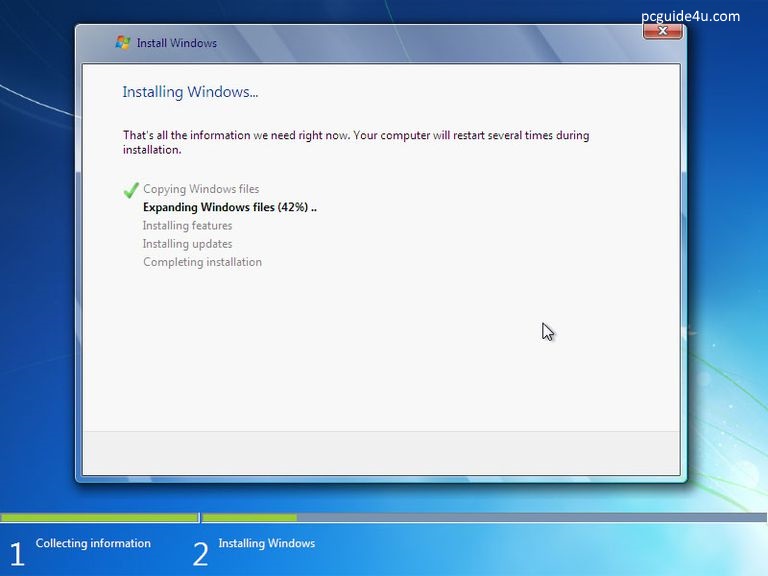
Step 11. Great work so far. You are going good. Now sit back, Windows will start doing the installation by itself. During the entire Windows installation process, your computer will reboot 2-3 times as required. Please do not interrupt the installation, let it be reboot/restart and keep watching your computer screen.
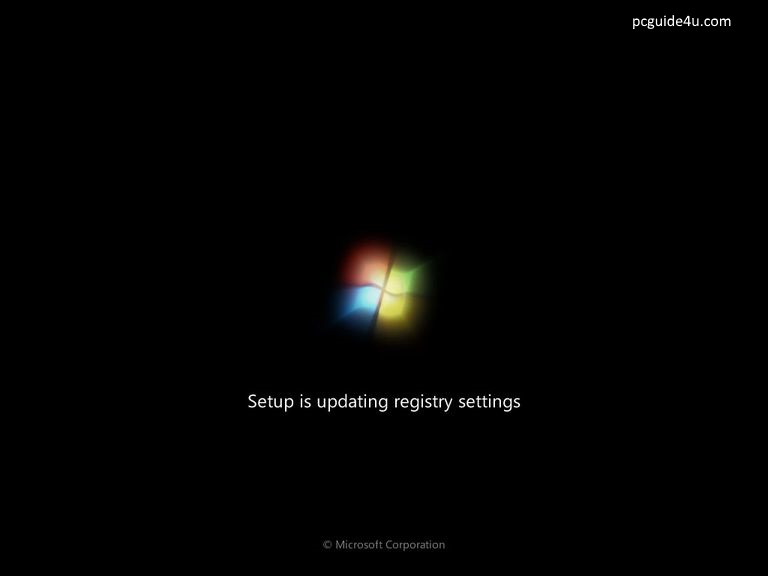
Step 12. After 20 minutes, setup is now updating registry settings for the final stage for installation. Then, it will be starting the various necessary services of Windows 7. After that, Windows installation will reboot your computer once again. Wait for it to come back. Once boot up, it will start preparing your computer for first use.
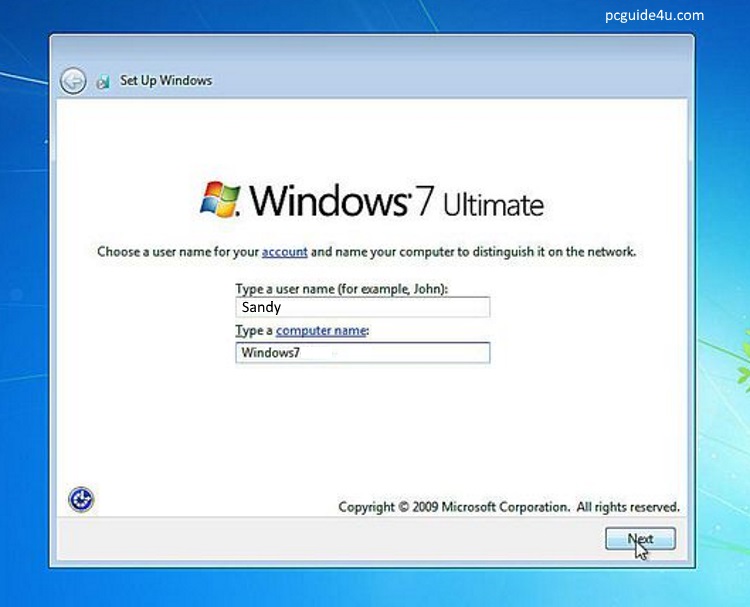
Step 13. Alright, Windows setup will give you an option to create/choose “User Name”. Type any name that you preferred and click on “Next” button. Also, it will ask you to “create a password” on next screen. If you required, else click “Next” to continue.
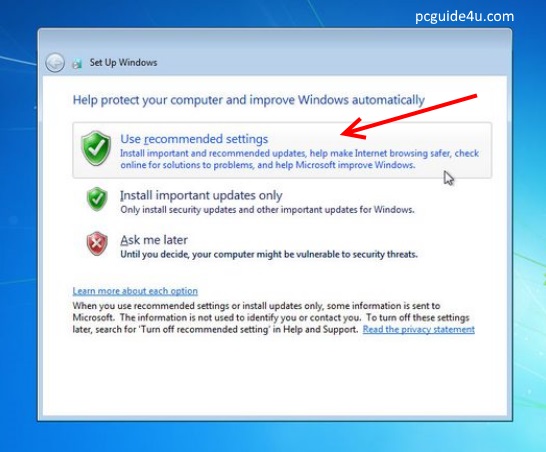
Step 14. On the next screen, Windows will ask you to select “Windows update” options. Select “Use recommended settings” and follow the rest of the on screen option i.e time and date settings, network selection (if basic network driver installed automatically) and select an appropriate one.
Finalizing Windows 7 Installation….
Step 15. Once above all steps are done. Windows 7 installation will be finalizing the setup and preparing you’re your desktop and finally, you will see the Windows 7 desktop screen with Windows 7 start menu and only one icon that is Recycle Bin.
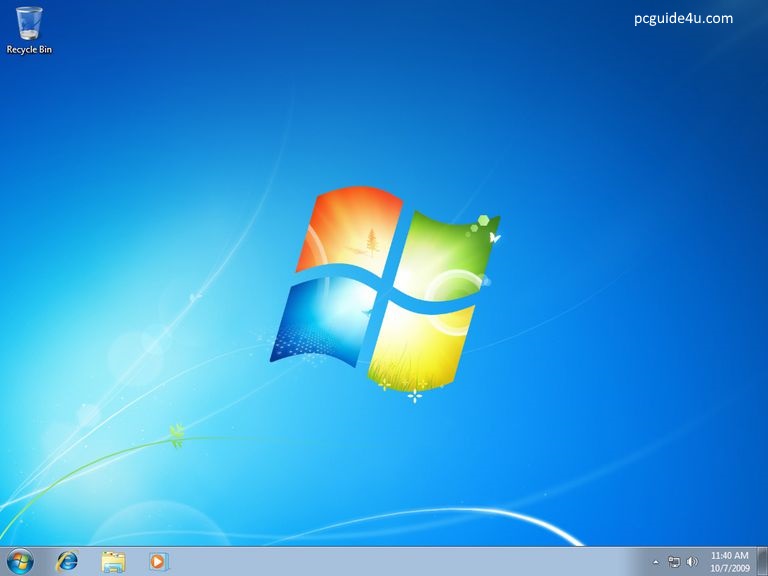
Congratulations, finally, you have successfully installed Windows 7 on your machine. Go ahead and install required drivers and software’s as per your need. If you have enabled automatic updated (on step 14), your computer may take required updates till next 2-3 days and restart several times as its required. So don’t worry, let it be done. You can keep using your Windows 7 meanwhile. Hope this article helps you to install Windows 7 properly. Entire Windows 7 installation process will take around 35-40 minutes, reset depends on your system configuration.
Download Windows 10 Pro ISO Image
Install Windows 10 Using USB Flash Drive