Disable Skype Auto Updates
There is one thing you may have noticed is annoying Skype auto updates and you must be looking for ways to disable Skype auto updates.
We will help you with this for sure, but before we get in to stop updating your Skype, let me tell you a bit about Skype for Windows app
What is Skype Desktop App?
Skype, you must have heard about it or may be using it already for sure.
If you are on the internet, Skype is a very good option to make audio and video calls, along with individual and group chats over the internet to any country and region.
By using skype app, you can interact with their family members who are living far from them.
Additionally, most office users also use skype app for professional use to make conference calls and individual or for group chats.
Of course yes, you just need a good internet connection and a computer desktop or a laptop with a webcam.
Skype is available for both Windows and MAC operating systems along with Android and iOS devices as well.
[Read: How To Disable Skype Banner Ads In Windows?]

How to Disable Skype Auto Updates Permanently?
In this article I will show you the steps by which you can disable Skype auto updates permanently on a Windows computer.
Keep following the steps exactly as shown below. Recommend not to skip any steps otherwise disabling Skype auto update won’t work.
Follow the steps given below:
Note: The following steps will work on Windows 7, 8.1 and Windows 10. You need Administrator rights to get this done.
Step 1. Open skype desktop app in Windows. Sign-in with your Skype ID and password.
Step 2. Navigate to the Tools Menu and select Options.

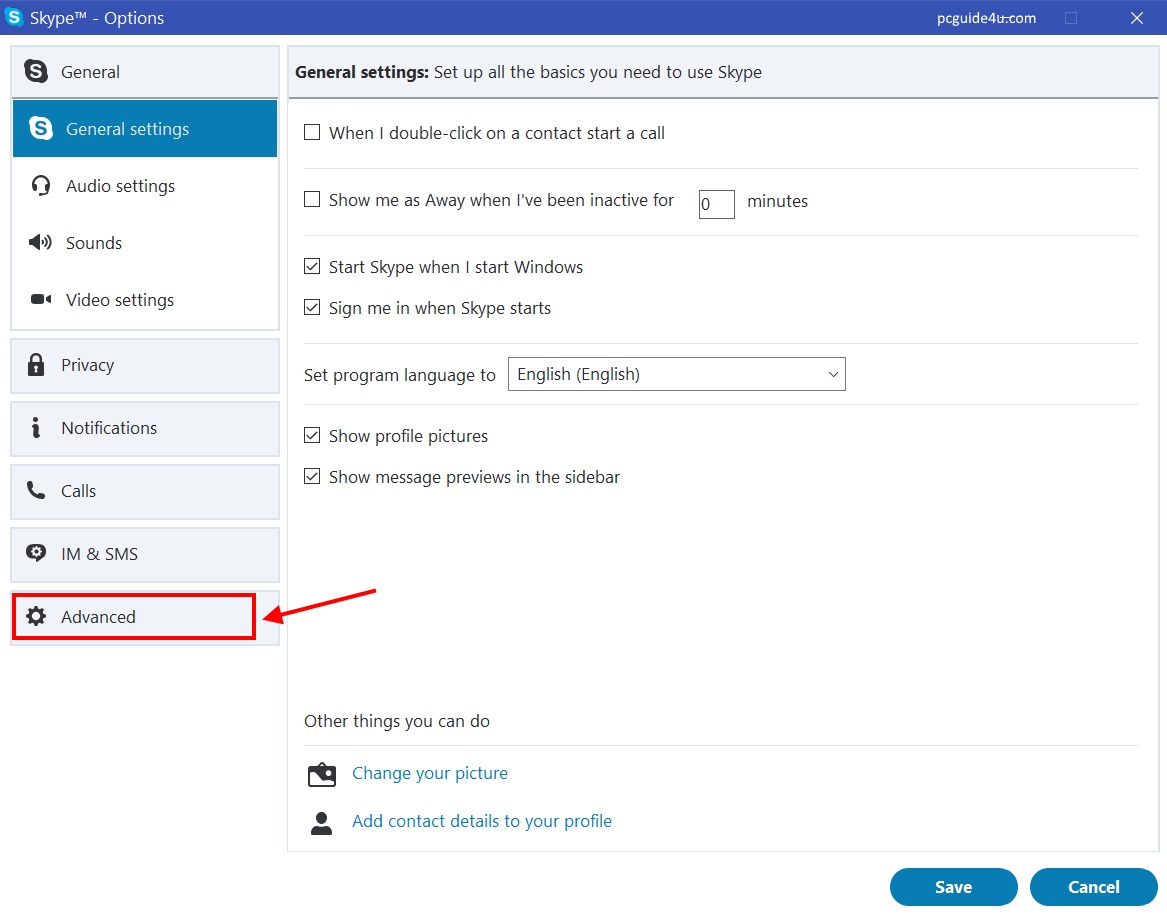
Step 3. All of the Skype options will appear on your screen.
From the left pane, select Advanced.
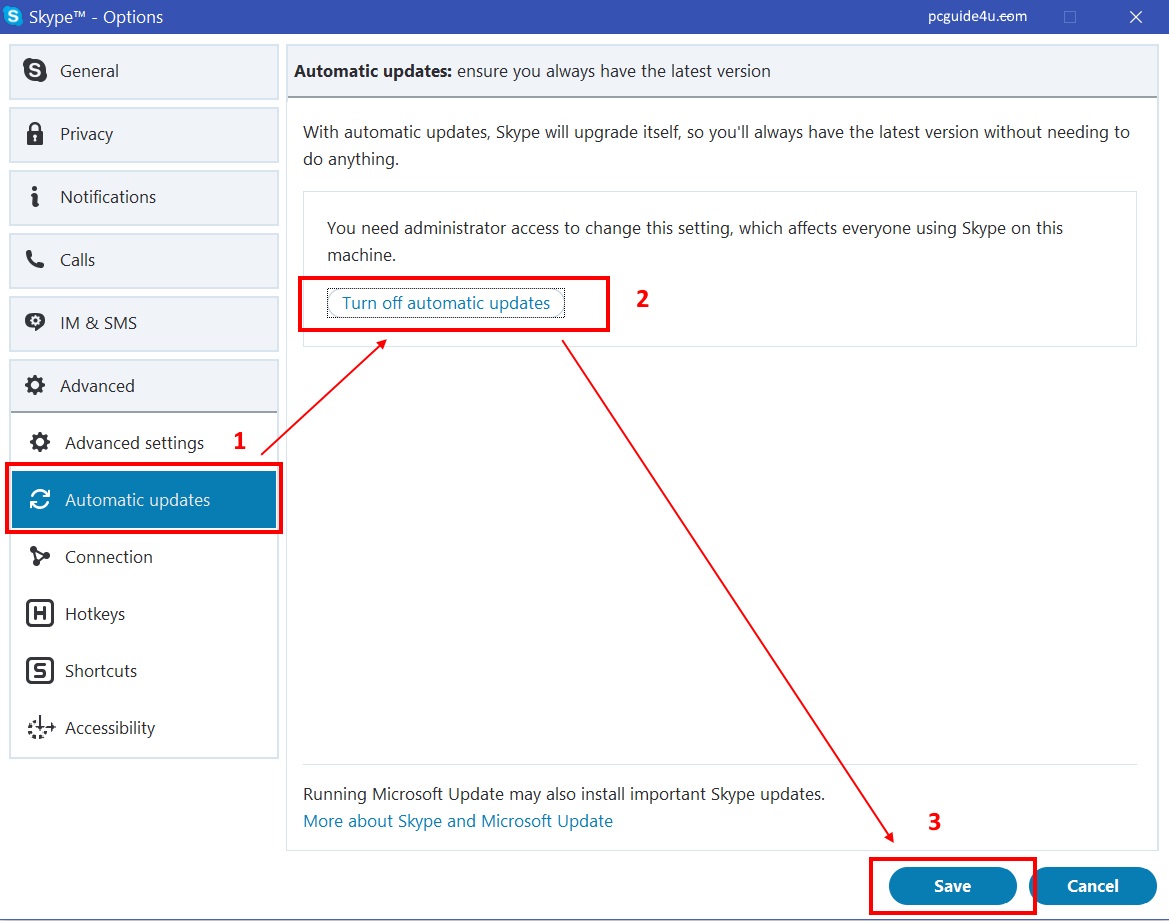
Step 4. Under Advanced, select Automatic updates then go to the right side and click on the button Turn off automatic updates.
Lastly, click on the Save button given to the bottom right.
Update – The Automatic Update option has been removed from Skype version 7.41 or later.
If you wish to download Skype version 7.40, available by the end of this article. You may continue to the steps given below if, already using a Skype version 7.40 or below.
Most of the tutorials end at the above step, but this is not by which you can permanently disable Skype auto updates. There are a few more steps that need to be done.
Follow the rest of the steps given below:
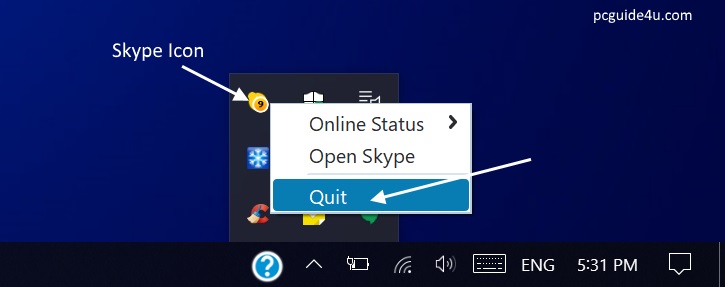
Note: For further steps we need to stop running Skype.
Sign-out skype desktop app, then quit from the notification area. Check out the image below:
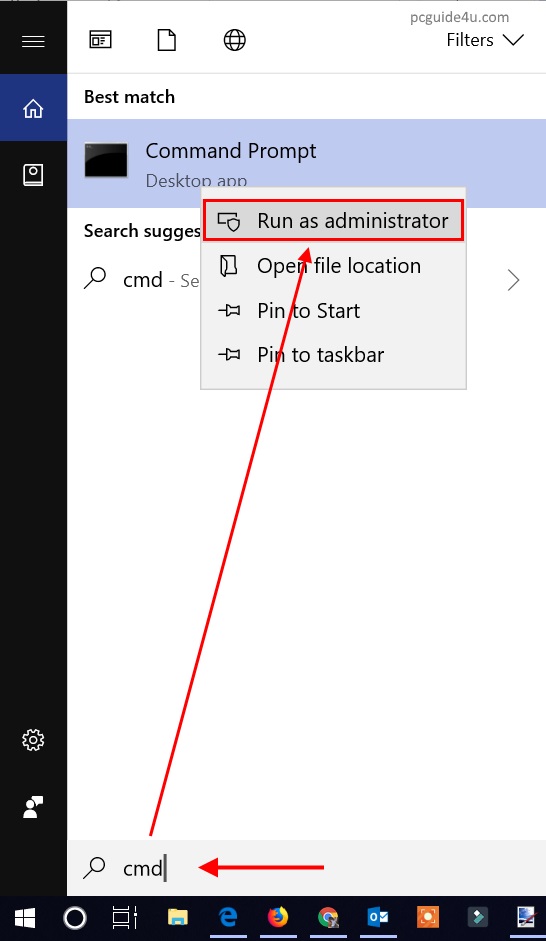
- Now, open the command prompt as administrator.Go to Windows Search and type cmd. It will show you the search results, right-click on Command Prompt and select Run as administrator.
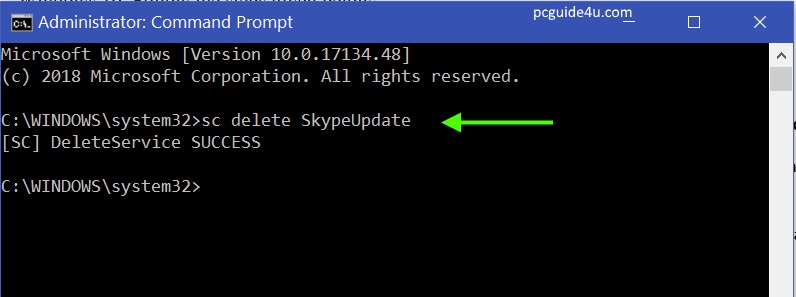
- A command prompt will open on your screen. Type sc delete SkypeUpdate and hit Enter from your keyboard.On the next line, you will see the message of SUCCESS. Close the command prompt screen.
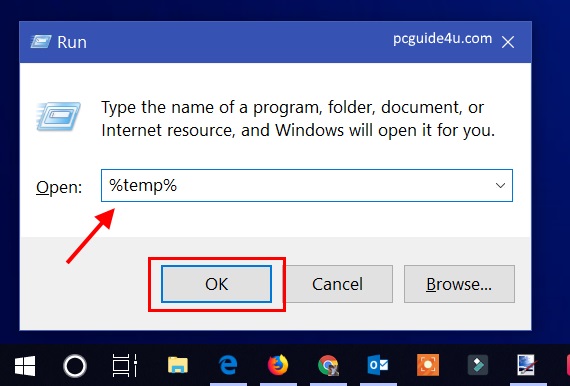
- Press Win + R to open the Run dialog box.Once open, type %temp% and hit OK. This will open a Windows Temp folder for you.
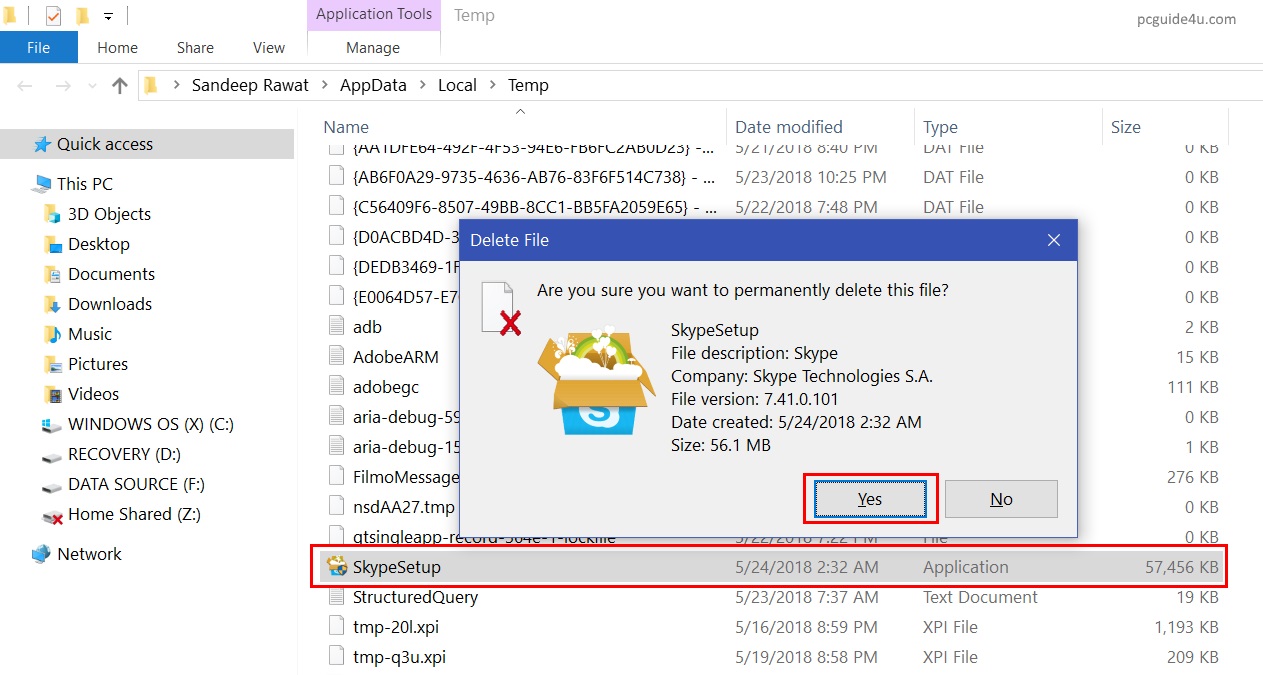
- Locate SkypeSetup.exe, select it and use the hot keys Shift + delete to delete this file permanently from your machine. Then, close the Windows Temp Folder.
Final Steps to Turn Off Automatic Updates on Skype with Registry Editor
Now the most important part comes here. We have to add registry value in order to prevent Skype from checking version updates.
Before we make changes to the Windows registry, we highly recommend that you back up your registry.
To open the Windows Registry Editor, press Win + R to open the Run dialog box and type, regedit and hit the OK button.

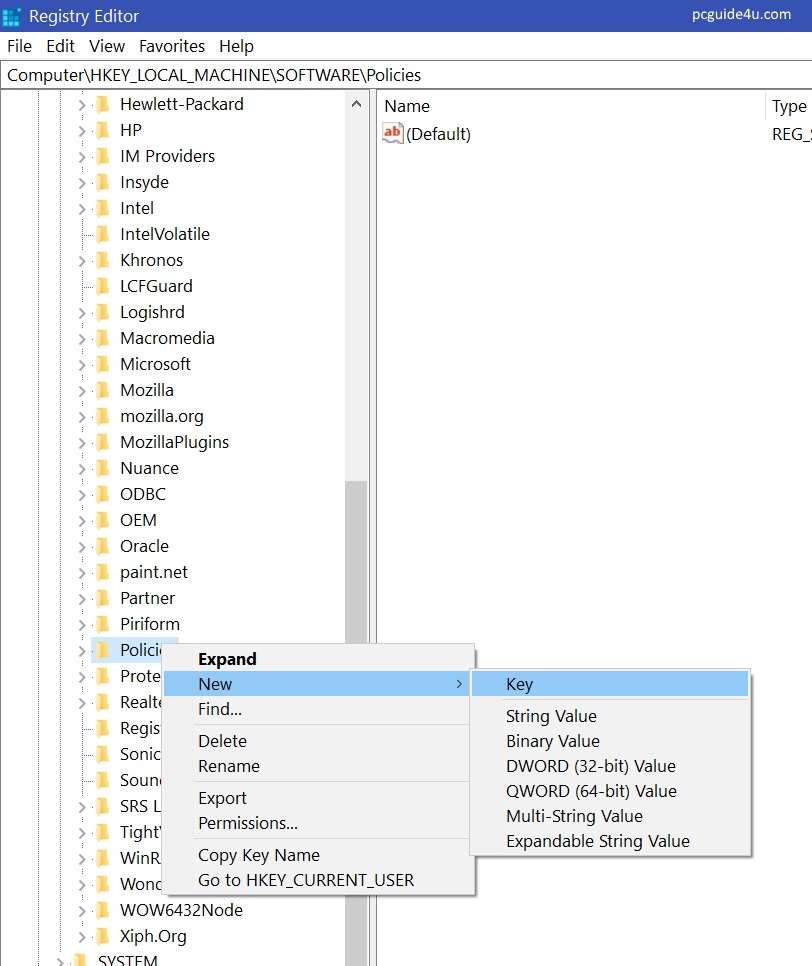
1) Once the Registry Editor opens, follow the given path: HKEY_LOCAL_MACHINE\SOFTWARE\Policies.
Then, right-click on Policies and select New -> Key -> name it Skype and hit enter.
By doing this, Skype is added under Policies.
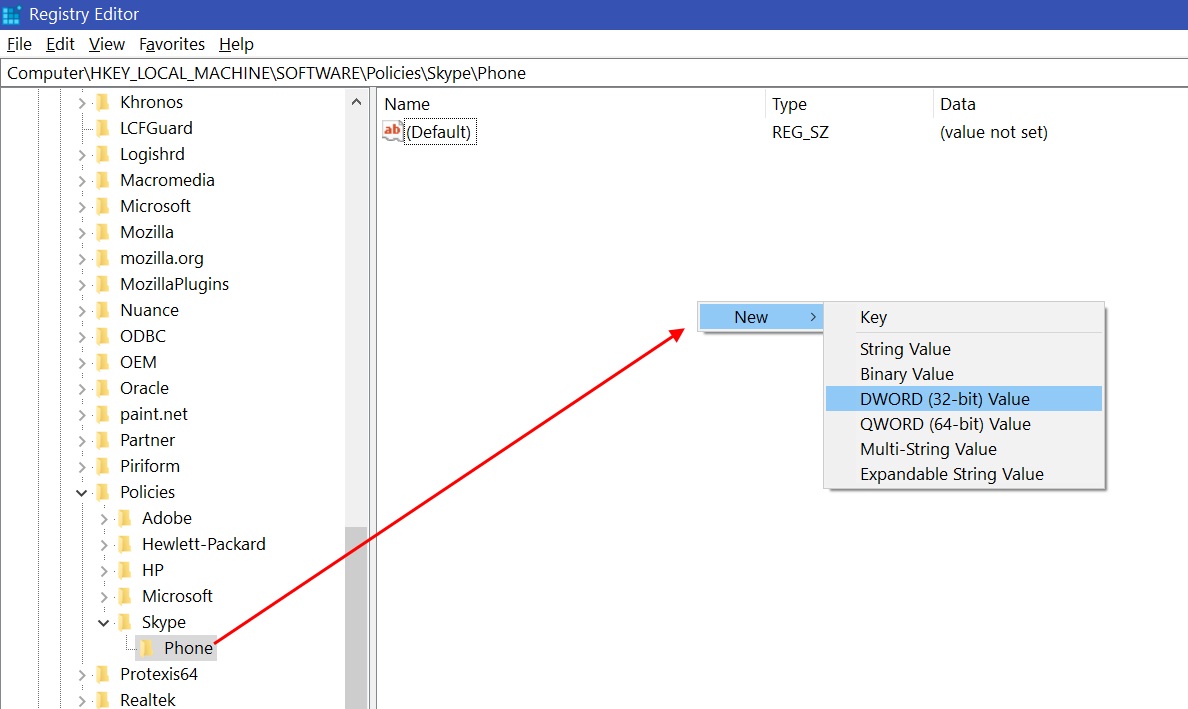
2) Now, right-click on the created Skype and select New -> Key -> name it Phone and hit enter. By doing this, the Phone will be added under Skype.

3) While the Phone key is selected, go to the right side and right-click anywhere and go to New -> DWORD (32-bit) Value. A new string is added with the name New Value #1.
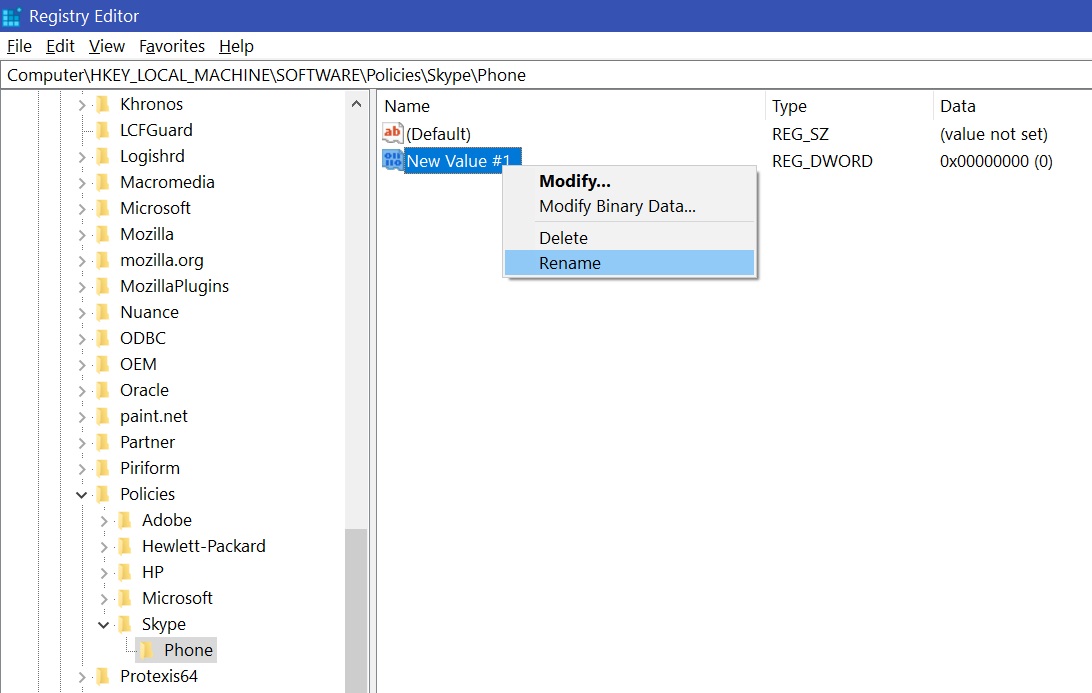
4) Right-click on New Value #1 and rename it to DisableVersionCheck
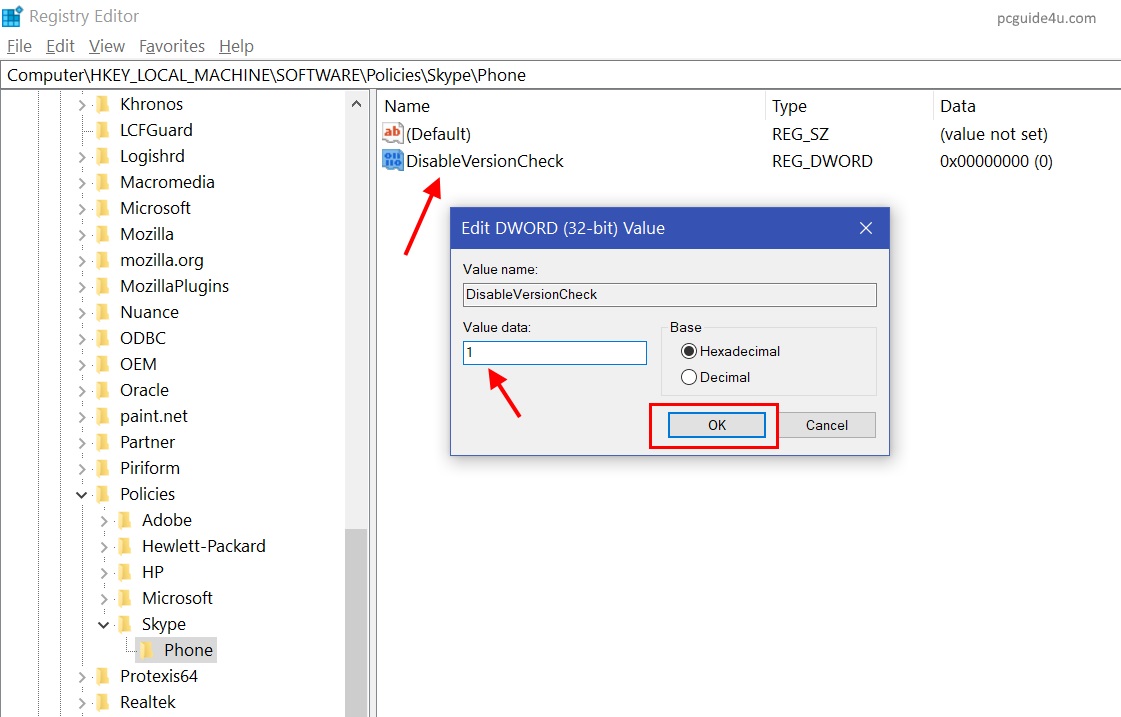
5) Now double click on DisableVersionCheck and change Value data: from 0 to 1 and click OK to close. Then you can close the Registry Editor.
Finally, you just need to restart your Windows computer once so all the settings we have made will be in effect.
Once your computer has rebooted and is back, launch Skype desktop app and sign-in with your username and password.
By doing all of the above settings, we have permanently disabled Skype auto update settings.
So, whenever you want to use the new version of skype app, you need to download it from the official Skype website and install it to your Windows PC.
This is how you can disable Skype auto updates.
As you are aware, the Automatic updates option has been removed from Skype version 7.41 or later. Many users are looking but can’t find the right place to download the Skype version 7.40.
Hereby, you can click the download button and download Skype version 7.40: